How to Use an AI Image Generator?
Introduction: Turn Words into Art
Have you also fallen for the magic of AI image generators? Did you type "astronaut riding a horse" but got something... weird instead of an epic scene? Don't despair, you are not alone. Tools like Imagen, Ideogram, or Flux are incredibly powerful, but the key to taming them is learning to speak their language.
Imagine AI as an incredibly talented but very literal artist. If you just tell it "paint a house", it might create anything from a gingerbread cottage to a skyscraper. Prompt engineering is the art of giving this artist precise, clear, and inspiring instructions to paint exactly the house you have in mind.
In this comprehensive guide, we will take you from the first uncertain steps to the moment when AI fulfills your creative visions on command. Let's get started!
Structure of an Effective Prompt: How to Talk to AI
Imagine you are directing a movie. You wouldn't just tell an actor "act", but you would give them a script, describe the scene, mood, and lights. It's the same with AI. An effective prompt is like a good script – it consists of several key parts that together create a masterpiece.
Key Ingredients of Your Recipe
Main Subject/Scene
This is the heart of your image. Be as specific as possible! Instead of "cat", try "fluffy ginger tomcat with a white bib, lazily lounging in the sun".
Environment
Add context and atmosphere to the scene. E.g., a quiet library, a busy Tokyo street at night, a deserted beach at sunrise, a misty autumn morning...
Lighting
Light is the soul of the image. Try "soft, diffused light", "dramatic side lighting", or "warm golden light of the setting sun".
Perspective
The angle of view changes everything. Try a worm's-eye view (for majesty), a bird's-eye view (for overview), or macro detail (to focus on details).
Artistic Style
Here you can go wild! Do you want an oil painting in the style of Impressionism, a minimalist vector illustration, or a photorealistic shot like from a movie?
Technical Specifications
The cherry on top for a top-notch result: "highly detailed", "sharp photography", "8K resolution", "depth of field".
Putting It All Together
It is best to proceed from the most important to the details. Here is a proven template:
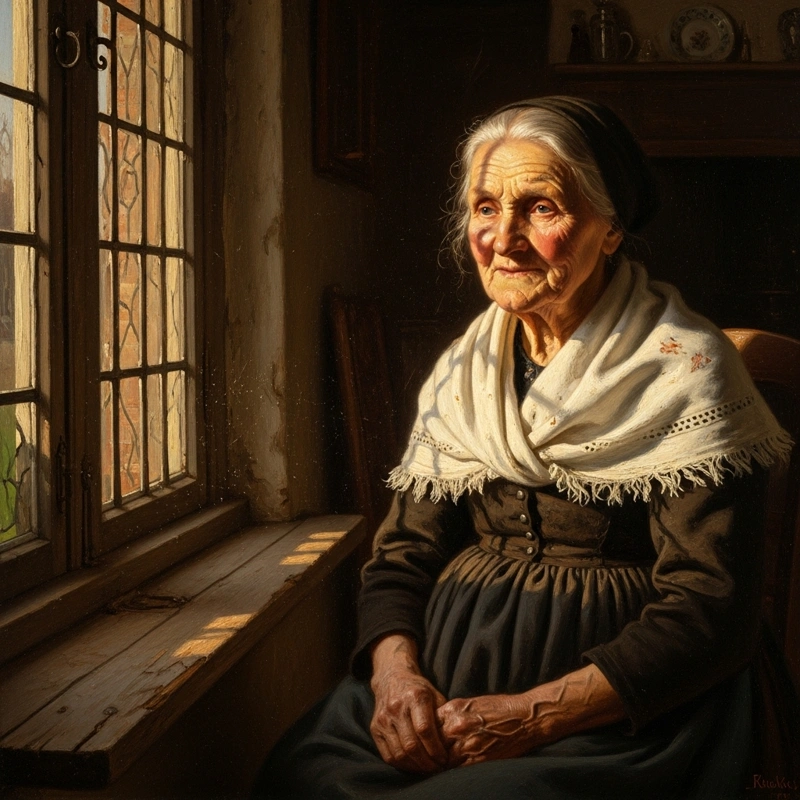
[Main subject] in [environment], [lighting], [perspective], [art style], [technical details]Let's try it in practice: We want a portrait of a wise elderly lady.
"Elderly woman with a kind face full of wrinkles, sitting by a window in a cozy country cottage, bathed in the warm golden light of the setting sun, close-up view, oil painting style by Rembrandt, hyper-detailed with dramatic contrast of light and shadow."
Negative Prompts: Tell AI What You DON'T Want
One of the most powerful tricks in your arsenal! Negative prompts are instructions telling AI what to avoid. It is like setting up bumpers on a bowling lane – you ensure the ball (result) doesn't go into the gutter (errors).
Think of a negative prompt as a "filter". It doesn't tell AI what to do, but gently removes what could spoil the overall impression. It's about preventing errors, not dictating style.
Common Problems You Will Solve
Anatomical Nightmares
No more six fingers and weird limbs!
deformed limbs, unnatural proportions, asymmetrical face, bad anatomy, bad hands, extra fingersVisual "Noise"
For a clean and professional look:
blurry, low resolution, grainy, pixelated, poor quality, double, watermark, text, signatureCompositional Chaos
Keep control over the scene:
cluttered, chaotic composition, distracting background, bad crop, out of frame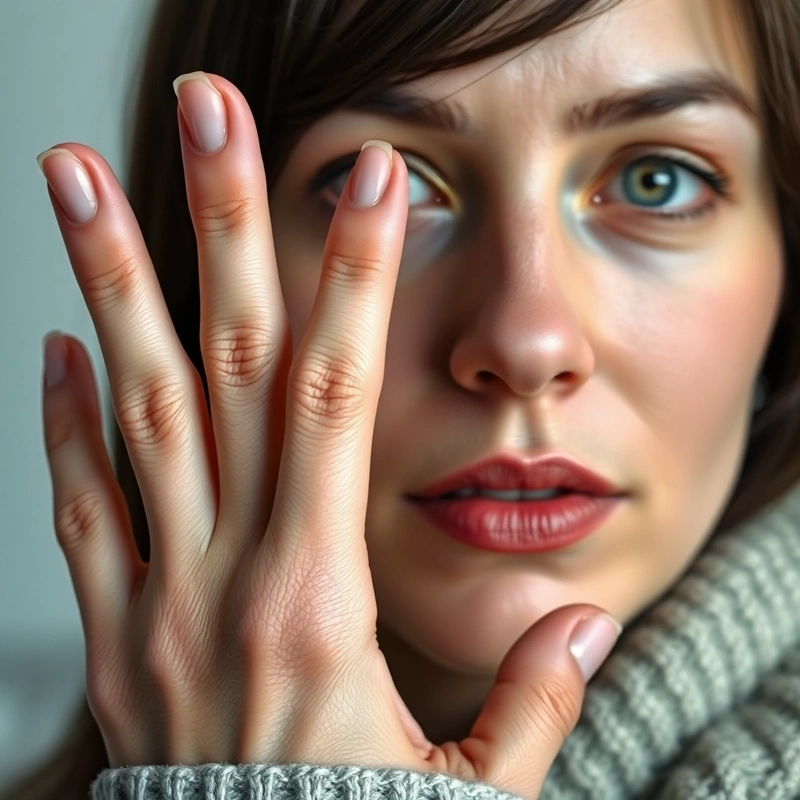
bad hands, extra fingers: Problem solved.Prompts by Content Type: Every Genre Has Its Rules
Just like a filmmaker uses different techniques for an action movie and a romantic comedy, you should adapt your prompts to what you are creating. Let's look at a few key categories.
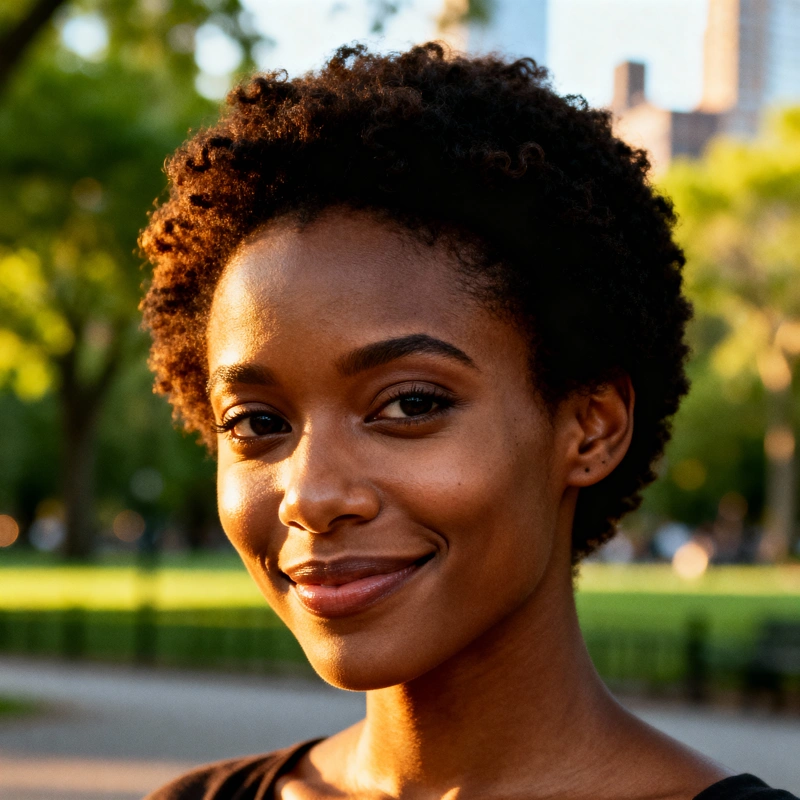
Portraits and Characters
The human face is a challenge. Our brain immediately detects every imperfection. Therefore, be precise.
- Focus on emotions: "thoughtful expression", "sincere laughter".
- Describe light: "Rembrandt lighting", "soft window light".
- Determine composition: "close-up of face", "full body in motion".
"Photorealistic portrait of a young African woman with short curly hair, looking directly at the camera with a gentle smile, warm side lighting emphasizing cheekbones, blurred urban park background, Annie Leibovitz style, 8K, highly detailed."
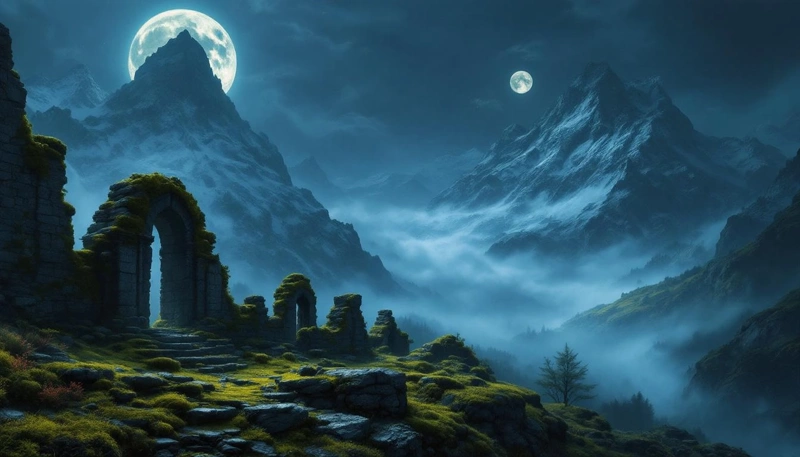
Landscapes and Environments
Here you can really express yourself creatively. The key is atmosphere.
- Determine time and weather: "golden hour in autumn", "snowy landscape at dawn", "dramatic sky before a storm".
- Create depth: Describe the foreground, middle ground, and background.
"Epic fantasy landscape, ancient stone ruins covered in moss in the foreground, mountains shrouded in mist towering in the distance, two moons shining above them, Albert Bierstadt painting style, atmospheric, cinematic lighting."
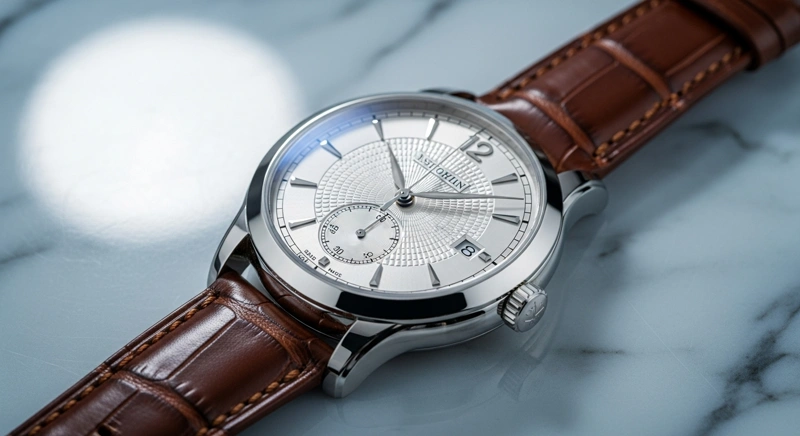
Product Visualization
The goal is clarity, precision, and attractiveness. Think like you are in a professional photo studio.
- Background: "on a clean white background", "on a wooden table next to a cup of coffee".
- Lighting: "studio lighting", "soft light from a lightbox".
"Professional product photography of a luxury wristwatch with a silver dial and brown leather strap, lying on a marble surface, clean studio lighting, macro detail, sharp focus, 8K, photorealistic."
Improving Anatomy: How to Beat the Cursed Hands
Hands. The eternal enemy of AI generators. Six fingers, weird shapes, unnatural poses... We all know it. But there are ways to help AI with correct anatomy.
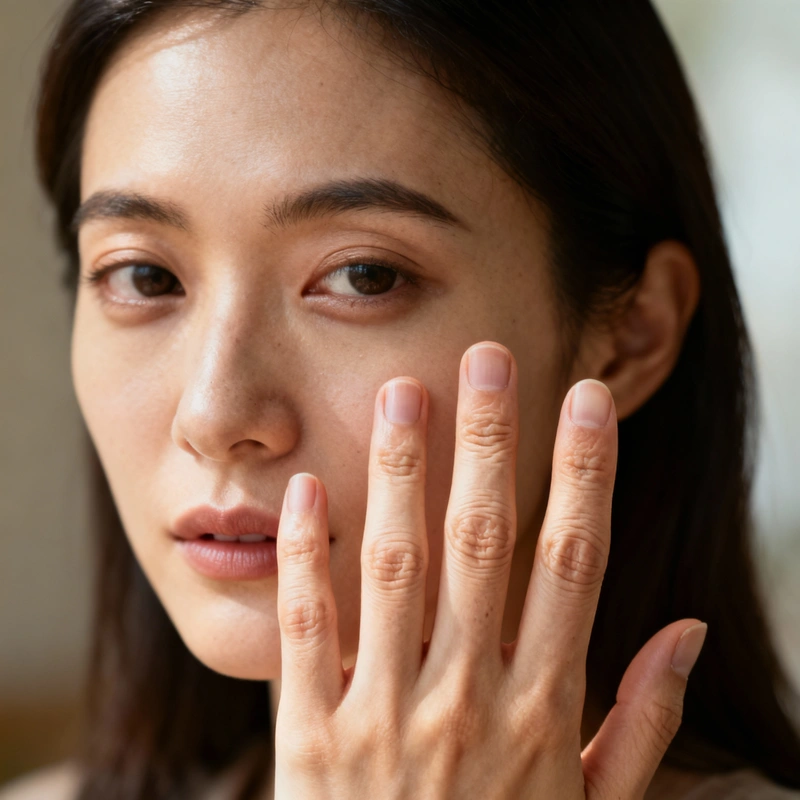
AI handles hands better if they have a task. Instead of "standing woman", try "woman holding a book" or "man with hands in pockets". This gives AI clearer context.
Your Arsenal for Better Anatomy
1. Be explicit in the positive prompt:
Tell AI exactly what you want to see.
anatomically correct hands, detailed hands with five fingers, realistic body proportions, symmetrical face2. Use a targeted negative prompt:
Forbid the most common mistakes.
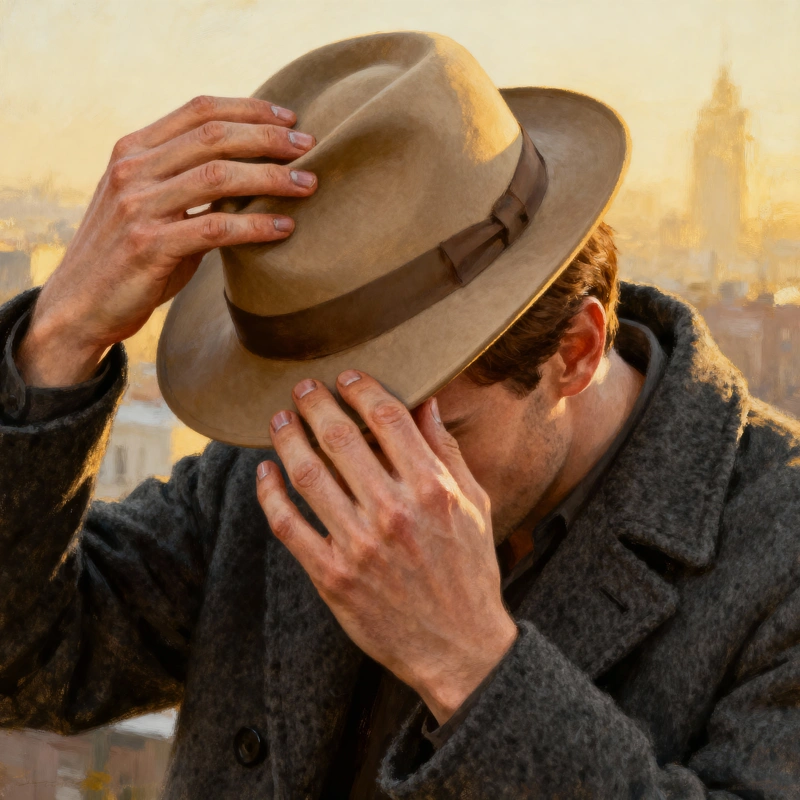
deformed hands, extra fingers, missing fingers, bad anatomy, disproportion, asymmetry, ugly3. Reference the masters:
Leverage the knowledge AI already has.
anatomy in the style of Leonardo da Vinci drawings, proportions according to classical Greek statues"Detailed portrait of a man holding the brim of his hat with both hands, anatomically correct hands with five fingers on each hand, detailed knuckles and fingernails, photorealistic style. Negative prompt: deformed hands, extra fingers, bad anatomy."
Consistent Style: Create Like a Pro
Do you want to create a series of images for a website, presentation, or maybe a comic? Then visual consistency is key. Nobody wants every page to look completely different. Images should also align with your brand voice. The goal is to create your own "style recipe" that you can use repeatedly.
How to do it? Create a "Style Prompt"
It is a part of the prompt that you will copy and paste into every task in the series. It should define key visual elements:
- Artistic technique: "minimalist vector illustration", "watercolor painting with paper texture", "cinematic photography".
- Color palette: "limited palette of pastel tones - light blue, apricot, mint green", "warm earthy tones".
- Lighting: "soft diffused daylight", "dramatic low lighting with sharp shadows".
- Overall impression: "clean and modern", "retro and nostalgic", "playful and cute".
Example of a style prompt for an icon series:
... , flat design style icon, soft long shadows, limited color palette (navy blue, coral, cream), on a circular background.You then just add the specific subject to this "recipe":
"Cup of coffee, flat design style icon..."
"Open book, flat design style icon..."
"Headphones, flat design style icon..."
The result is a perfectly matched set:
Conclusion: Your Journey to Mastery Begins
Congratulations! You have just completed a crash course in the art of creating AI images with artificial intelligence. Remember that every great result is a combination of knowledge, creativity, and a bit of experimentation. Don't be afraid to make mistakes, try crazy ideas, and gradually build your own style.
Key Points
- Structure is your foundation: Always start with the subject, add environment, light, and style.
- Negative prompts are your friends: Actively prevent errors.
- Every genre has its specifics: Adapt your approach to portraits, landscapes, and products.
- Anatomy can be tamed: Be specific and give characters "work".
- Consistency is professional: Create a "style recipe" for image series.
- Practice makes perfect: The best way to improve is to generate, generate, and generate.
Recommended Workflow for Every Project
- Vision: What exactly do I want to create? What feeling should it have?
- Prompt Construction: Assemble the basic prompt according to our "recipe".
- Filtration: Add negative prompts to remove typical errors.
- Generation: Create several variations and analyze what works best.
- Refinement: Adjust the prompt based on results and try again. Repeat until satisfied.
- Final Touches: Don't be afraid to fine-tune the final image in a graphic editor!
Now you have all the tools. Go and create amazing things!