How to Remove Objects from Photo: Easy AI Retouching Guide
You have a perfect shot, but…
You’ve just photographed a beautiful sunset on vacation. The composition is perfect, the light is magical. Only… there’s a trash bin lying in the corner. Or even worse — the moment you pressed the shutter, a tourist in a huge orange jacket walked into the frame.
Know that feeling? Unwanted objects in photos can ruin an otherwise perfect moment. And that’s only the beginning of the frustration. But don’t worry — we’ll show you how to remove objects from a photo using the AI photo editor. You’ll see for yourself that it’s actually very simple.

Why classic photo retouching methods fail
Maybe you’ve already tried removing an object in a regular editor. Clone stamp, brush, blurring the surroundings… And the result?
A blurry smudge that looks worse than the original problem.
Traditional methods have their limits:
- Blurry patches where the object used to be
- Visible cloning marks — textures don’t repeat naturally
- Unrealistic transitions between the retouched area and the surroundings
- Hours of work in graphic editors with an uncertain result

Manual photo editing is a bigger problem than you think
You spent half an hour on a photo, trying to retouch a sign out of the background — and the result? A blurry smudge that’s obvious at first glance. The photo ends up in the “Unused” folder, even though it could be in your portfolio.
At a time when:
- Every shot goes to Instagram, Facebook, or LinkedIn
- E-commerce requires clean product photos without distracting elements
- Presentations and materials must look professional
You can’t afford a photo with distracting elements or low-quality retouching.
Professional editing in a graphic editor? That’s hours of work and advanced skills. And what if you have dozens of photos like that?
How AI can remove objects without blurring
Here’s the key difference: Modern AI inpainting (generative fill) doesn’t work like an eraser, but like intelligent reconstruction.
What does AI do differently?
Instead of simply “smudging” the surroundings, the algorithm:
- Analyzes the context of the entire photo — understands perspective, light, textures
- Infers what should logically be there under the removed object
- Creates a natural background that’s indistinguishable from the original
- Respects structures — paving continues in the right direction, lines don’t break


The result? No one can tell there was ever anything there.
Tutorial: how to remove objects from an image using AI
Depending on the type of object, use one of these approaches:
Method 1: Edit image (for large, easy-to-describe objects)
✅ Ideal for:
- Tourists in the background
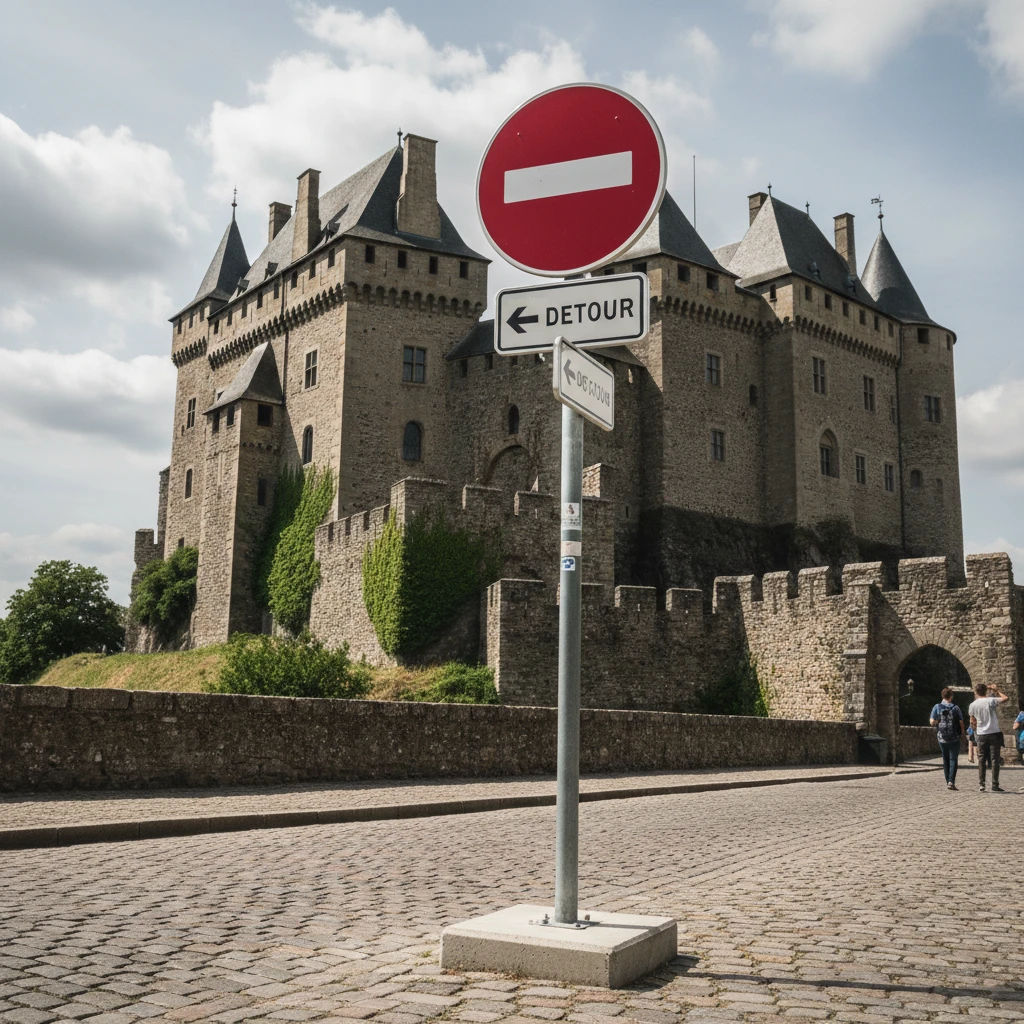
- Traffic signs
- Trash bins
- Cars, benches, stands
- Cables and wires
How to do it:
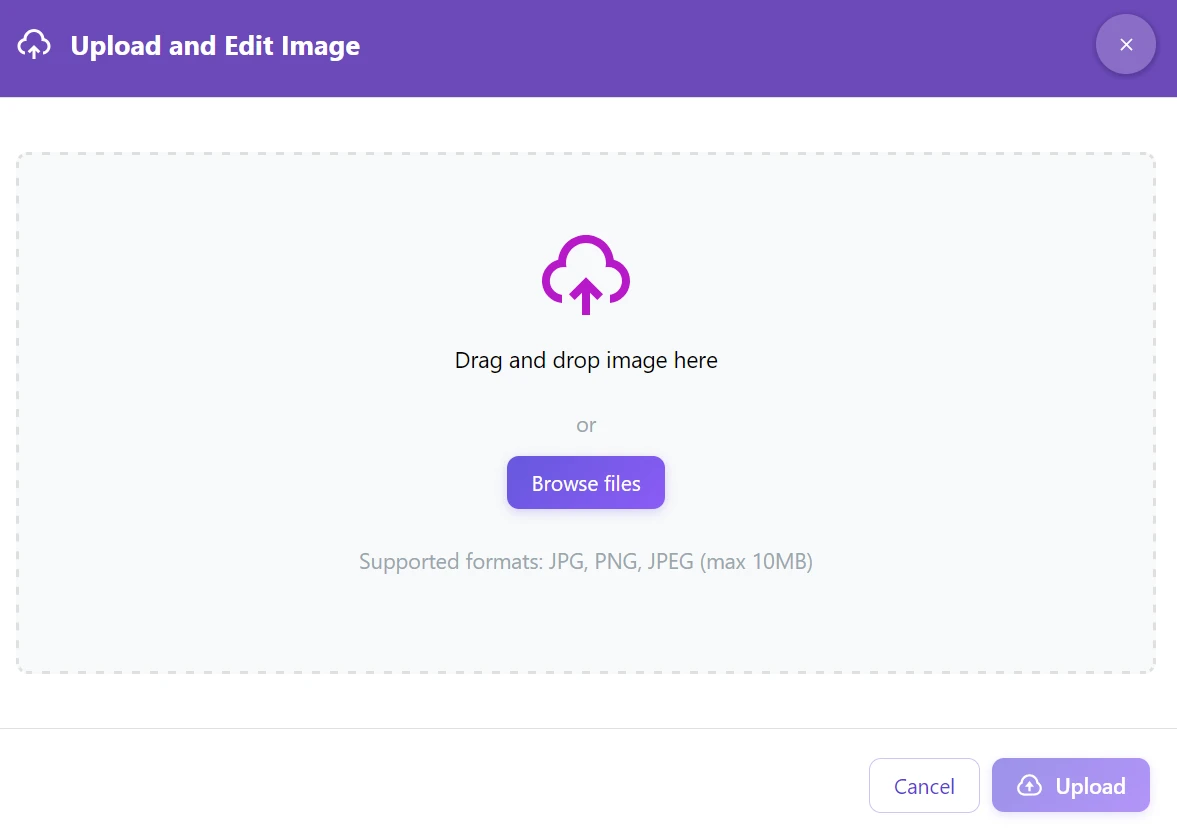
Step 1: Go to the gallery and upload a photo to the GuideGlare AI image editor
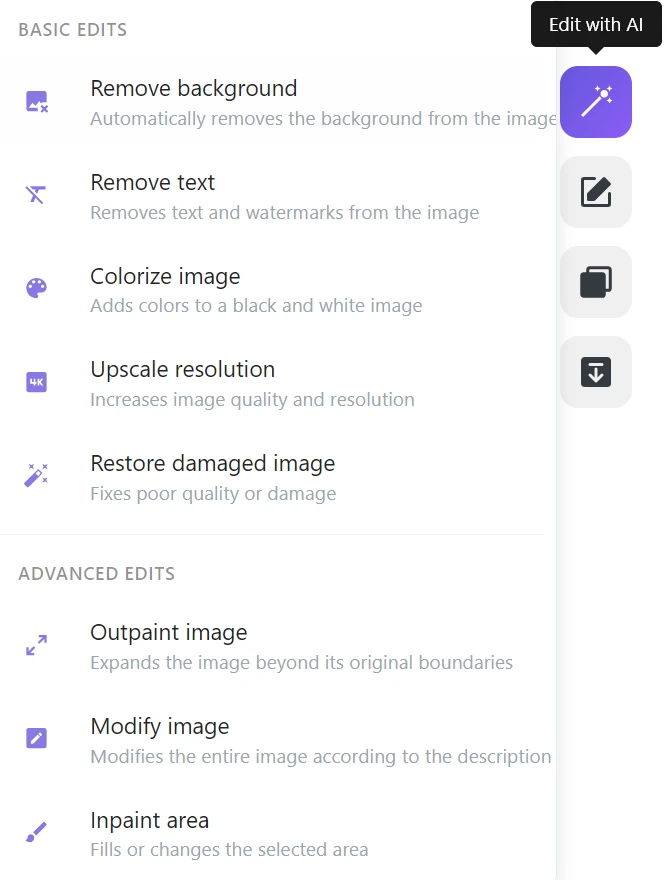
Step 2: In the right menu, click “Edit with AI” → “Change image”
Step 3: In the “Change description” field, type in your language:
- “Remove the tourist from the photo”
- “Delete the traffic sign”
- “Erase the trash bin from the foreground”
- “Remove the person in the red jacket”
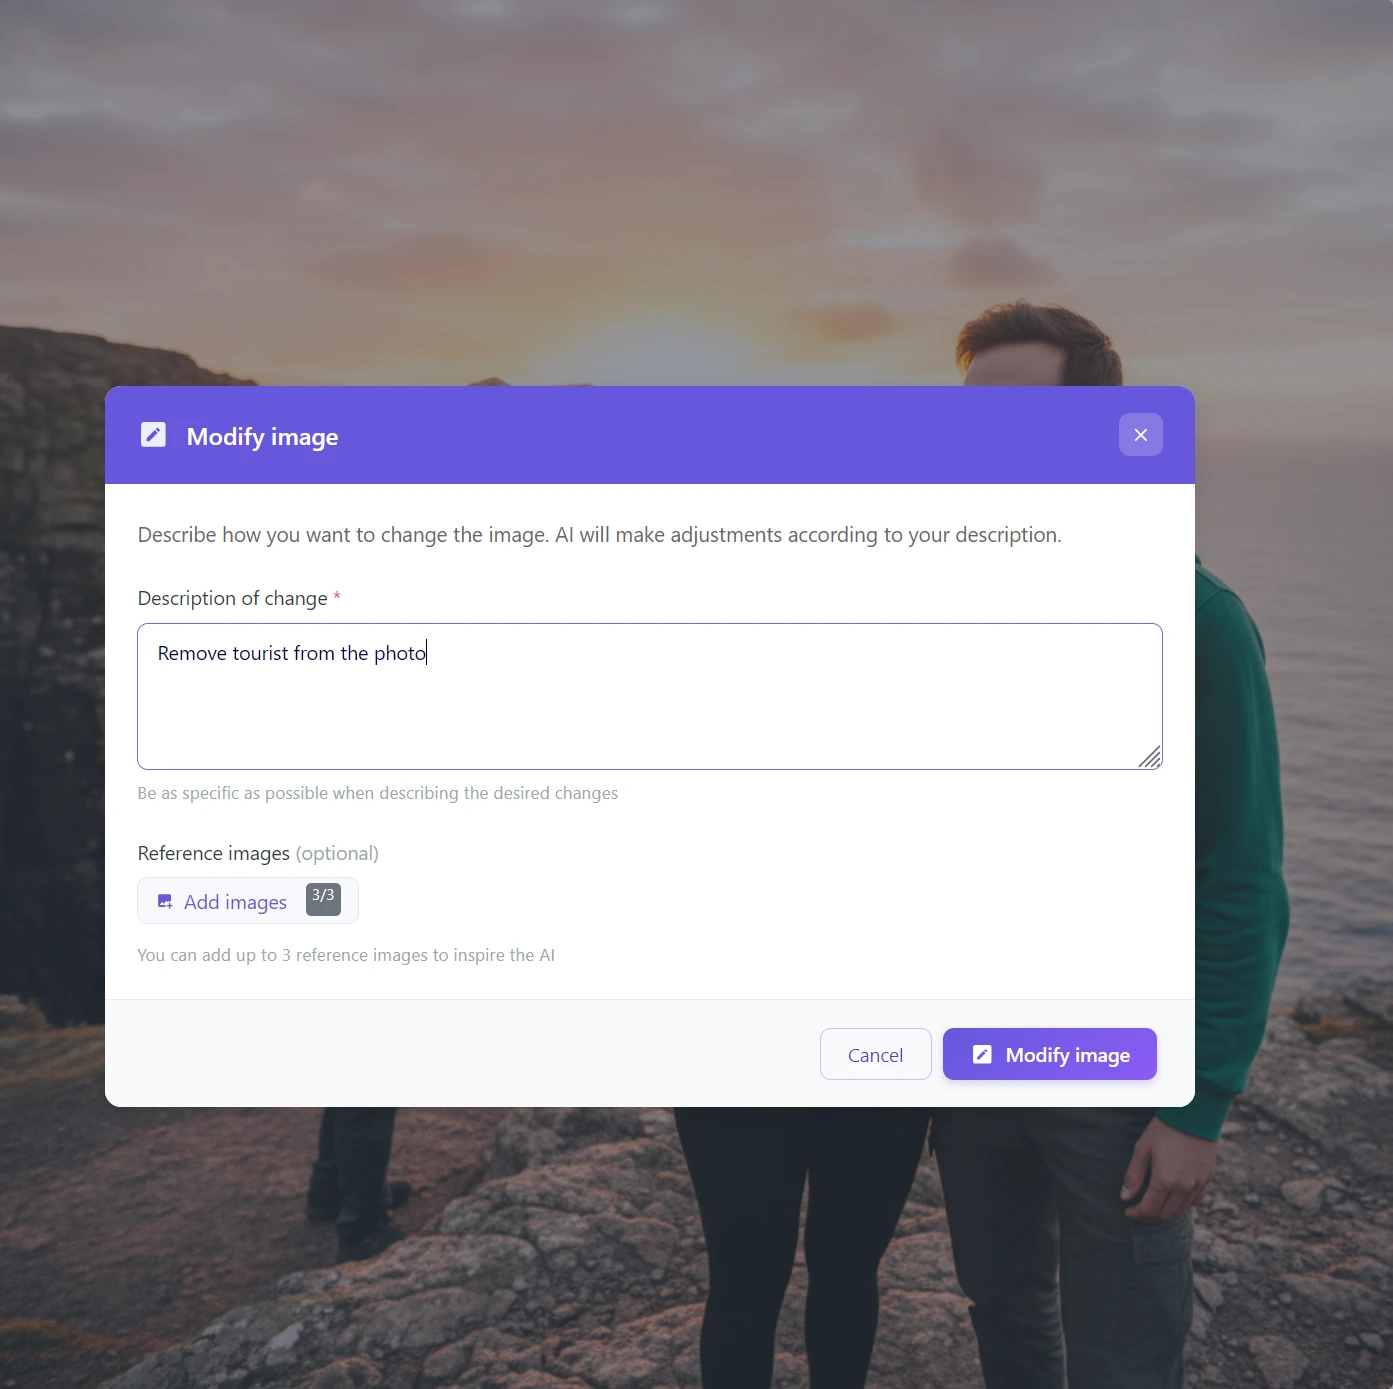
Step 4: Click “Edit image” and wait 5–10 seconds

AI understands natural language. You can write “remove the tourist”, “erase the bin”, or simply “that person on the left” — AI will understand what you mean.
Magic eraser on a text command
While previously you had to painstakingly trace every person separately, GuideGlare works like a smart magic eraser. For quickly erasing people from a photo (for example a distracting crowd in the background of a landmark), try a bulk command: "Remove all people in the background". AI will analyze the scene, keep the main subject, and perform complete photo cleanup for you.
Method 2: Inpaint area (for small objects or complex details)
✅ Ideal for:
- Stains on an object
- Scratches and damage
- A logo on a T-shirt
- Small details that are hard to describe in words
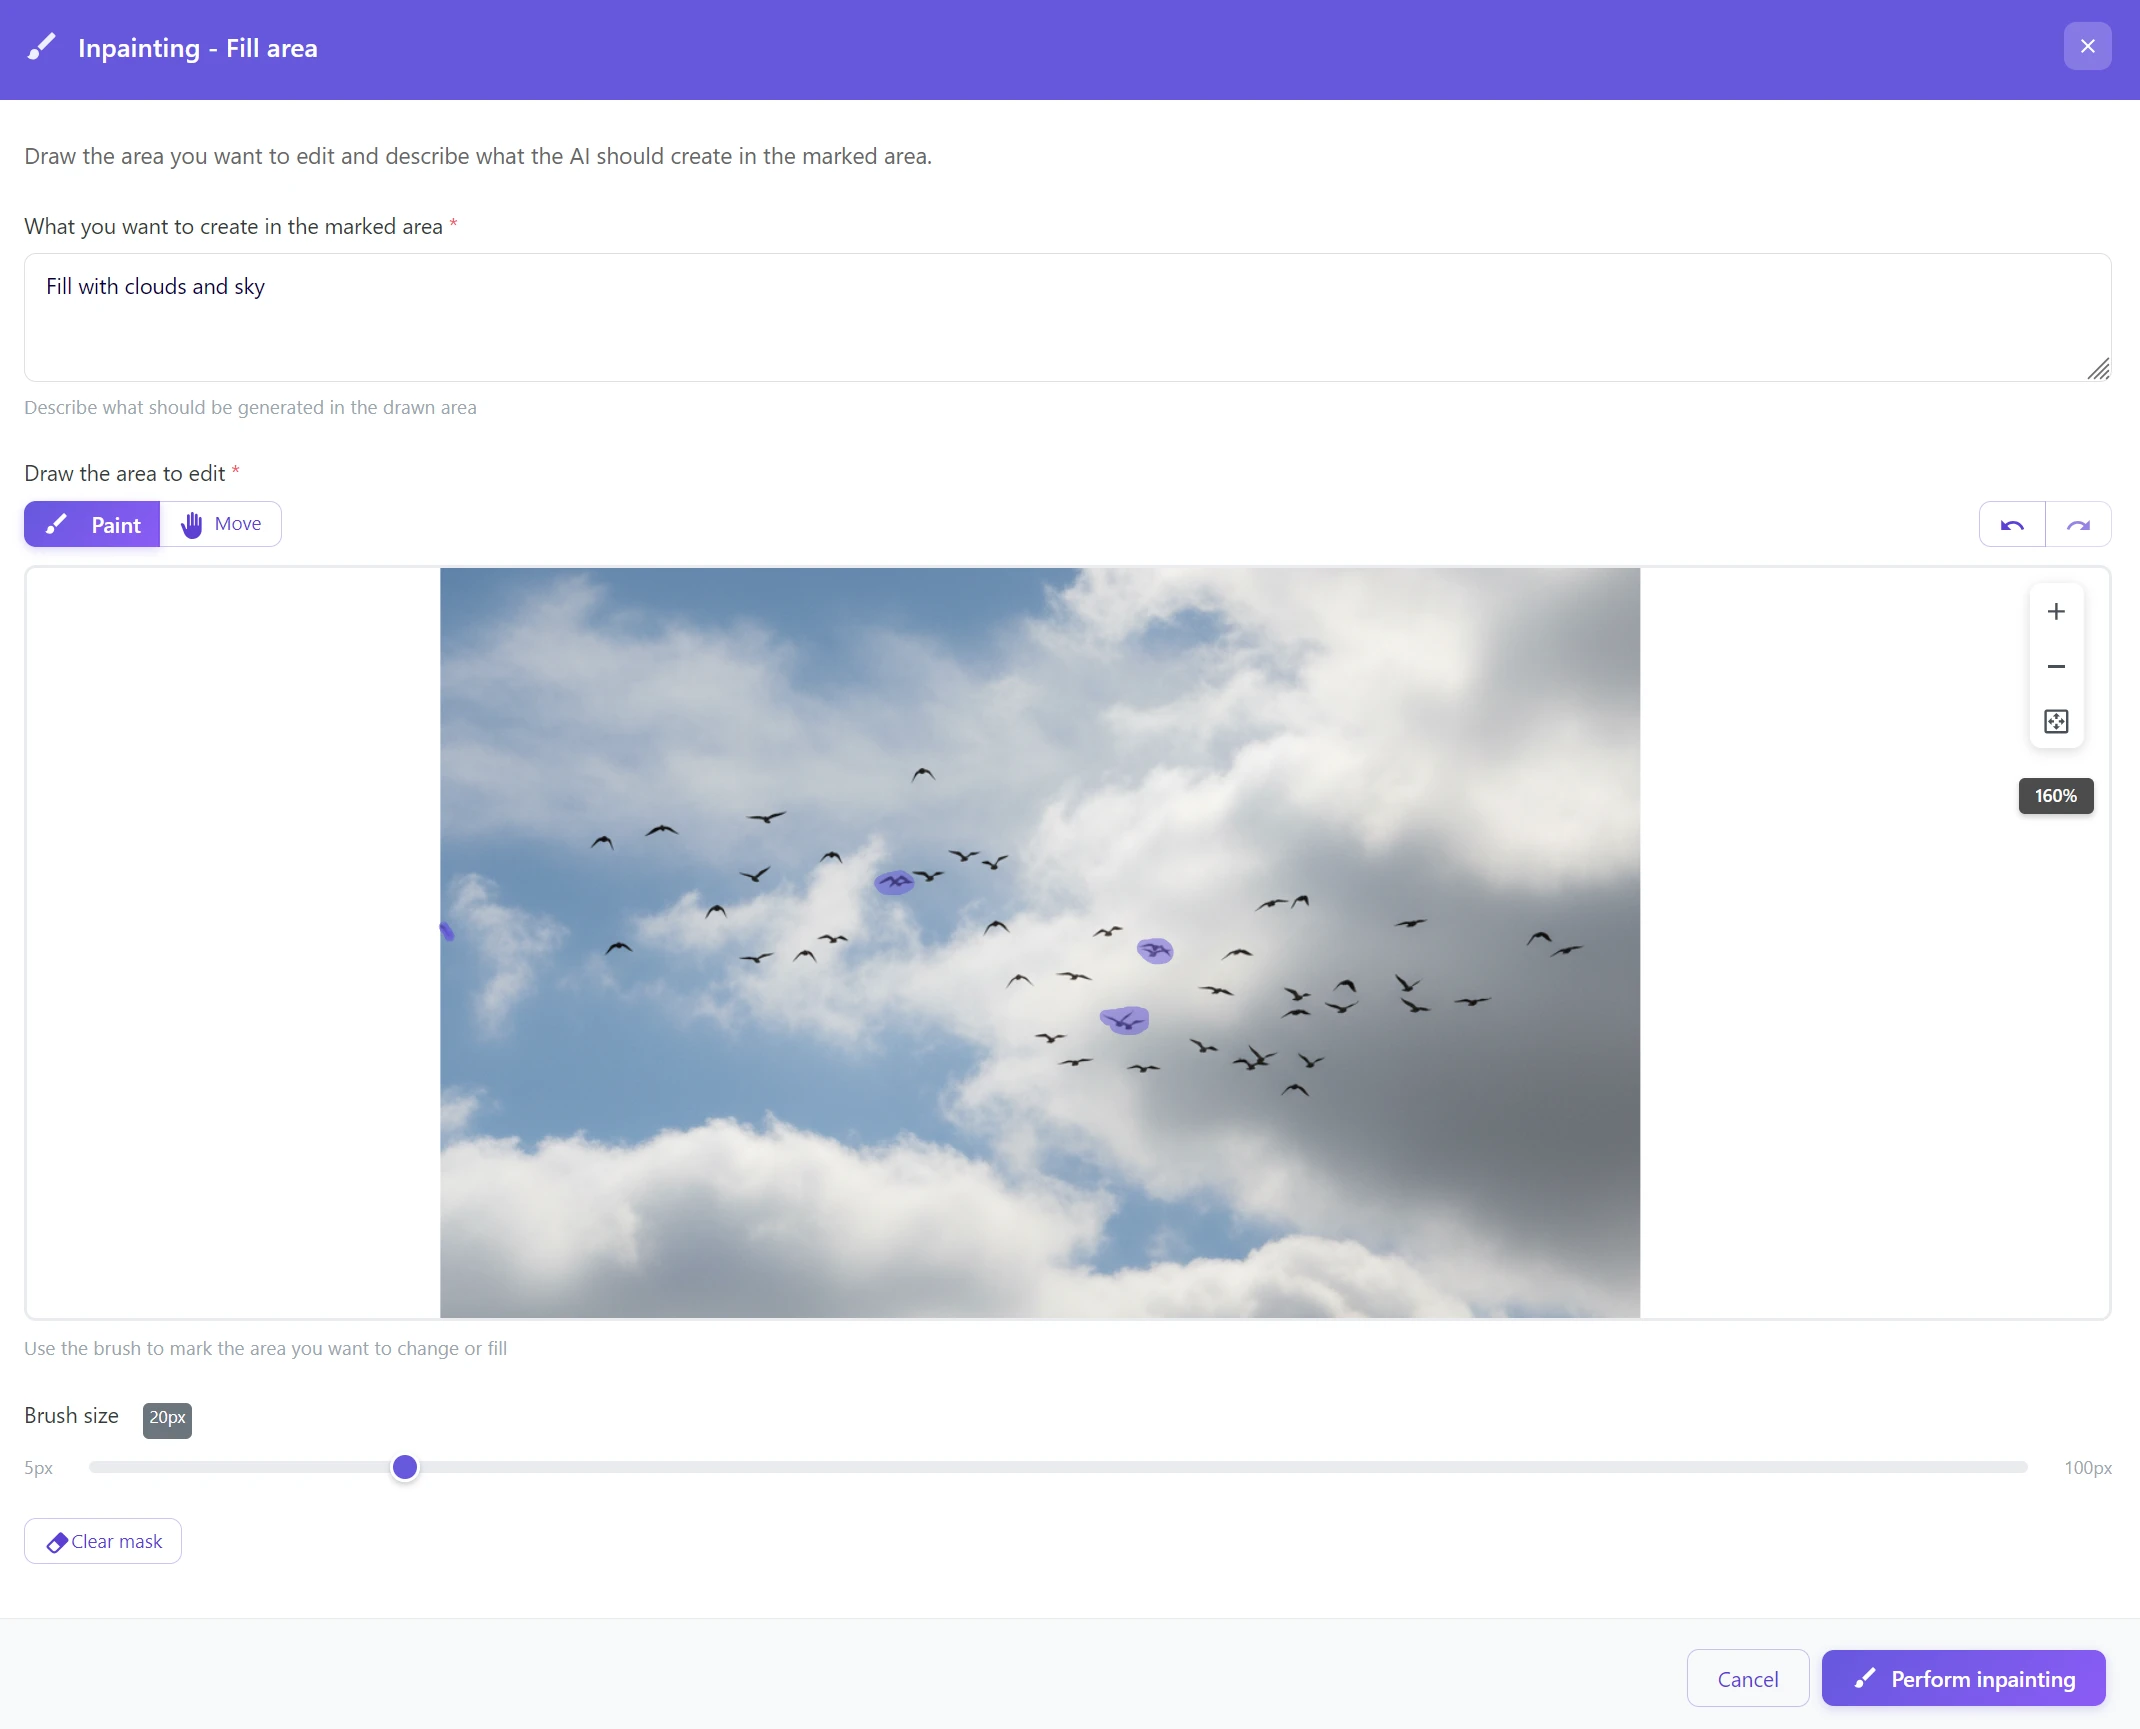
- Birds in the sky (if you want to remove only some)
How to do it:
Step 1: In the AI photo editor menu, select “Edit with AI” → “Inpaint area”
Step 2: With the brush, paint over the objects you want to remove
- You don’t have to be precise — AI will detect edges
- You can resize the brush with the slider
💡 Tip: We recommend selecting a slightly larger area so the AI knows what surroundings to use for filling
Step 3: In the “What do you want to create in the selected area” field, type in your language:
- “Fill with clouds and sky”
- “Continue the paving”
- “Grass like the surroundings”
- “Clean wall”
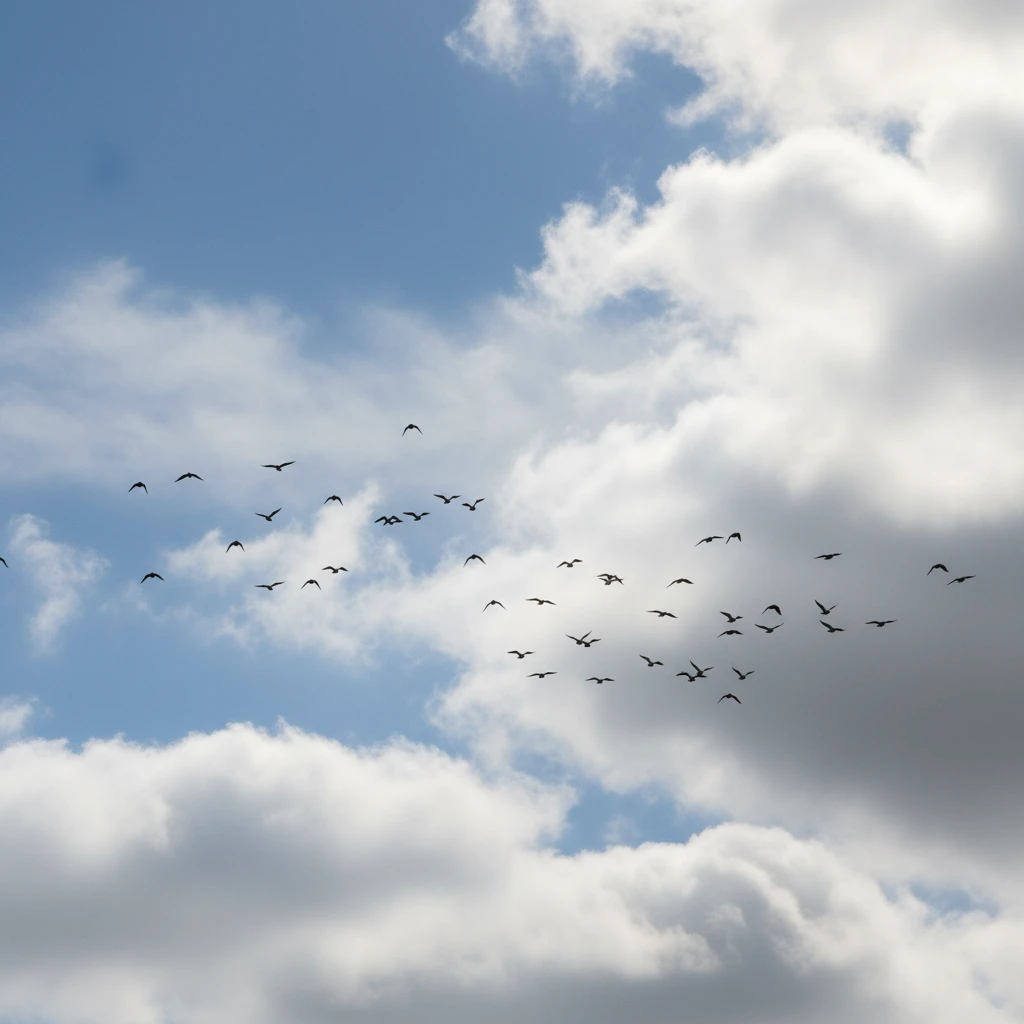
Step 4: Click “Run inpainting”

💡 Tip: GuideGlare AI understands your language. You don’t have to write in English — Czech, Slovak, or any other language works just as well.
When to use which tool?
| Edit image | Inpaint area |
|---|---|
| Large objects (person, car, sign) | Small details (stains, scratches) |
| Easy to describe | Hard to describe in words |
| Faster (one prompt) | More precise control |
| “Remove the tourist” | I’ll brush out the logo |
💡 Golden rule: If you can describe it in one sentence → Edit image. If it’s easier to show → Inpaint area.
Practical examples of using the AI eraser
The magic eraser is useful anywhere a photo is great but ruined by a small thing: a foreign object in the shot, a distracting detail, clutter in the background. Typically it works by marking the unwanted object (finger/brush/lasso) and AI fills in the background as if the object was never there.
Vacation photos
A beautiful sunset, perfect composition… and in the corner there’s someone else’s backpack, cup, towel — or a tourist walked into your frame. This is the most common magic-eraser scenario, because backgrounds (sand, sea, sky) are usually easy to complete.
→ Edit image: “Remove the backpack from the sand”
Architecture and landmarks
You’re photographing a historic building or landmark and the city’s reality is relentless: traffic signs, bins, bollards, cables, ads. The AI eraser is great for cleaning the scene so the architecture stands out.
→ Edit image: “Erase the traffic sign and the trash bin”
Product photos
You photographed a product on a table, but in the background there are things that don’t belong: a cable, keys, a mug, papers, crumbs. The AI eraser can quickly tidy the background so the product looks more professional (ideal for classifieds, e-shops, portfolios).
→ Inpaint area: Paint over the objects and AI will restore a clean table. Need the product completely without background? Read the AI background removal tutorial.
Landscape photos
Beautiful nature, but birds are flying in the sky, there’s a wire or a mast in the distance, or a sign from a hiking trail creeps into the frame. For landscapes, the AI eraser often works great because sky, grass, water, and forest have “fillable” patterns. The most sensitive parts are subtle transitions (fog, sky gradients) — there it pays to select more gently.
→ Inpaint area: Mark the birds/wires and write “clear sky”
Tips for the best results
What works:
1. Write naturally in your language
- ❌ You don’t need: “Remove the object from the left”
- ✅ Just: “Remove the object on the left”
2. Be specific in your descriptions
- ❌ “Remove something”
- ✅ “Remove the red traffic sign on the left”
3. Use AI inpainting for complex objects
- If the object has a complicated shape or is partially covered, use the brush instead
4. If the result isn’t perfect, try again
- AI sometimes needs a second attempt
- You can tweak the prompt or mark the area more precisely
5. Mark a bit more than necessary
- For area fill, it’s better to include a bit of the surroundings so AI understands the context
Don’t forget shadows and reflections!
The most common mistake when removing unwanted objects? People erase the main object, but its shadow on the ground or reflection in glass stays behind. Unlike the outdated clone stamp, which would only smear the surroundings badly, we recommend marking the object including its shadow with the brush. AI will then reconstruct natural light and surface texture so the retouch looks 100% believable.
Common mistakes:
- Too vague a prompt: “make it better”
- Removing objects that are essential to the composition
- Expecting perfection in very complex scenes
AI retouching vs. traditional retouching
| Criterion | Traditional tools | AI in GuideGlare |
|---|---|---|
| ⏱️ Time | 15–60 minutes per photo | 10–30 seconds |
| 🎯 Accuracy | Depends on skill | Consistently high |
| 💡 Skills | Advanced graphic editing knowledge | Can describe/mark |
| 🌍 Language | Mostly English interface | Your own language |
| ✨ Result | Often visible artifacts | Natural result |
| 💰 Price | Higher tens to hundreds of euros | GuideGlare from €15/month |
Start removing objects from photos with AI today
No more hours in an editor. No more blurry smudges.
With AI photo editing in GuideGlare, you can remove unwanted objects in a few clicks — and the result looks like the problem object was never part of the photo.
Just upload a photo, type in your language what you want removed, and AI will do the rest. It works for tourists in the background, traffic signs, trash bins, and even small stains.
Perfect photos. No compromises.
No more blurry smudges or hours wasted in an editor. Upload your image and watch AI cleanly and naturally remove anything that ruins your shot in just a few seconds. The result? A perfect photo, ready to share.
Frequently asked questions
Is AI object removal free?
To use advanced AI tools in GuideGlare, such as generative fill, you need an active subscription, for example the Basic plan. These tools use computationally demanding AI models, which are different from simple “eraser” features in free apps.
Why isn’t it free? While free tools often leave only a blurry smudge, our AI analyzes the entire image and reconstructs the missing background so the result is clean and natural. You’re paying for professional quality and technology that saves you hours of work and delivers results without compromise.
Can I write AI commands in Czech?
Yes, absolutely! That’s one of the main advantages. GuideGlare’s AI is designed to understand natural language, so you don’t need to think in English commands. Just write in Czech, Slovak, or any other language what you need done.
Commands like “remove that tourist in the blue jacket” or “erase the trash bin in the bottom right” work perfectly reliably. The goal is to make photo editing as intuitive and accessible as possible for everyone.
How long does it take to remove an object from a photo?
Processing is very fast. Depending on your photo size and the complexity of the task, the AI operation itself usually takes only 10 to 30 seconds. Compared to the tens of minutes or even hours you’d spend manually retouching in traditional software, it’s practically instant. This lets you efficiently edit even larger batches of photos in a short time.
Does object removal work on a mobile phone too?
Yes, fully. GuideGlare is a web app, which means it works in a browser on any device — desktop, tablet, or smartphone. You don’t need to install anything. On mobile, you can conveniently upload a photo directly from your gallery and edit with touch controls.
Practical mobile tip: When using the “Inpaint area” tool (brush), zoom in with two fingers (pinch-to-zoom) so you can mark even small details you want to remove as accurately as possible.
What if the result isn’t perfect on the first try?
AI isn’t magic, and sometimes — especially with complex backgrounds — it needs a little guidance. If the result isn’t 100%, you have a few options:
- Try again with a different prompt: Sometimes it’s enough to rephrase. Instead of “remove the car”, be more specific: “remove the red car and fill in grass behind it”.
- Use a different tool: If the text prompt (“Edit image”) fails, switch to “Inpaint area”. With the brush, you have full control over the selected area.
- Fix the fix: Sometimes a small imperfection remains after removing an object. Simply use “Inpaint area” on that small flaw and let AI correct it. Repeat until you’re satisfied.
Will AI reduce the quality of my original photo?
It’s important to understand that when removing an object, AI doesn’t “wash out” the area — it regenerates it completely. Newly generated pixels may not always have exactly the same grain or sharpness as the rest of the original high-resolution photo, so a slight texture change is possible.
The solution is simple: If you feel the retouched area looks slightly different, use the “Increase resolution” (AI upscaling) feature after removing the object. This tool unifies the entire image, smooths any inconsistencies, and overall increases quality and sharpness.
Can I remove text or a watermark from an image too?
Yes, technically it works very well. AI can handle removing text, a logo, or a date in the corner of a photo. For this task, it’s usually best to use “Inpaint area”, because you can precisely mark the text area with the brush and AI reconstructs the background underneath.
Important notice: Always be mindful of copyright. Use this feature only on your own photos (e.g., removing a distracting camera date) or on images you have the rights to edit.
What’s the main difference between “Edit image” and “Inpaint area”?
Both tools remove objects, but each works a bit differently.
- Edit image (with a prompt): You tell the AI WHAT to do. It’s the fastest method for clearly defined objects you can easily describe (“remove the sign”, “erase the person”). AI finds the object and removes it.
- Inpaint area (with a brush): You show the AI WHERE to work. This gives you precise control over which part of the image should change. It’s ideal for small details, scratches, logos, or objects on complex backgrounds.
Simple rule: If you can say it in one sentence, use “Edit image”. If it’s easier to point it out with a finger (or brush), use “Inpaint area”.