Remove Date Stamp from Photos: 3 AI Methods
Date Stamp in the Corner of a Photo. A Small Detail, a Big Disadvantage.
Do you remember the period around 2005? You bought your first digital compact camera and went on holiday. You snapped one photo after another, excited by the new technology. But it was only at home, on your monitor, that you discovered an unpleasant truth.
In the bottom right corner of every photo, an aggressive orange, red, or yellow date glowed.
Back then, this feature seemed useful for archiving. Today, it’s a flaw that devalues the photograph. The numerical data distracts from the main subject, disrupts the composition, and on every photo screams “this is a technical record,” not a memory.

The Date Stamp Isn’t a Problem Until You Try to Use the Photo
Hidden in a digital archive, a date stamp doesn’t bother anyone. The problem arises when you genuinely want to use the photo.
Do you want to have it printed on canvas or in a family album? The date will be in the middle of the print. Do you want to share it on social media as a memory? Bright red numbers will immediately reveal that it’s an old amateur photo. Do you want to frame it as a gift? The date will spoil the entire intention.
Cropping won’t solve the situation – in most cases, you’d lose an important part of the shot, as date stamps tend to be precisely where the scene is richest. And manual retouching in graphics programs leaves blurry smudges that are completely noticeable on complex backgrounds (grass, sand, textile patterns).
The result looks repaired. And sometimes that’s worse than the original problem.
AI Doesn’t Erase the Date – It Replaces It With What Was There
Modern AI image editing doesn’t just work like an eraser. It doesn’t remove pixels and leave a hole or a blurry smudge. Instead, it analyzes the surrounding texture, light, and scene context – and credibly regenerates the missing area.
The lawn remains a lawn. Sand remains sand. A face remains a face. Only the date disappears.
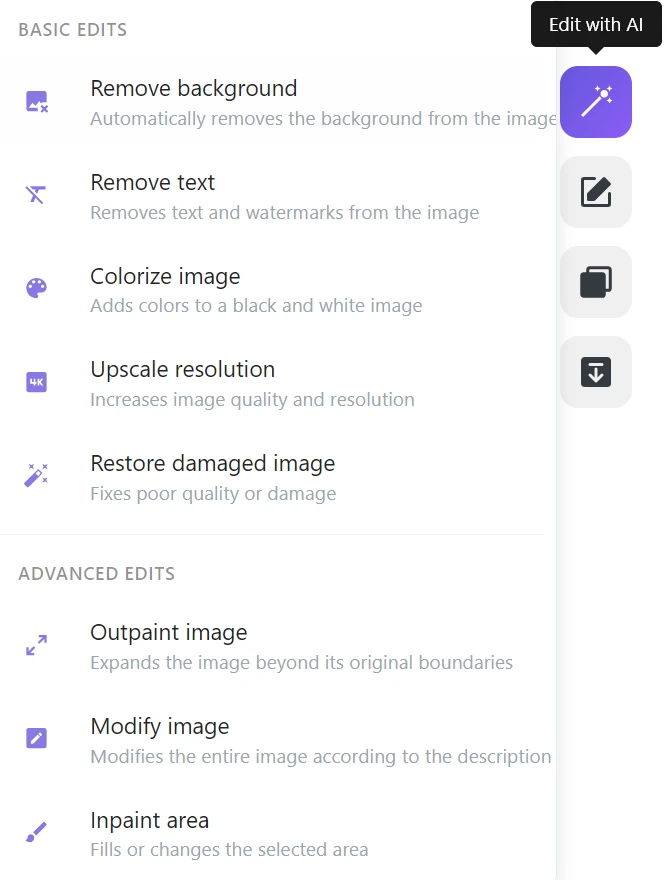
In the GuideGlare AI photo editor, you have three ways to remove the date. Each is suited for a slightly different situation.
3 Methods to Remove a Date from a Photo
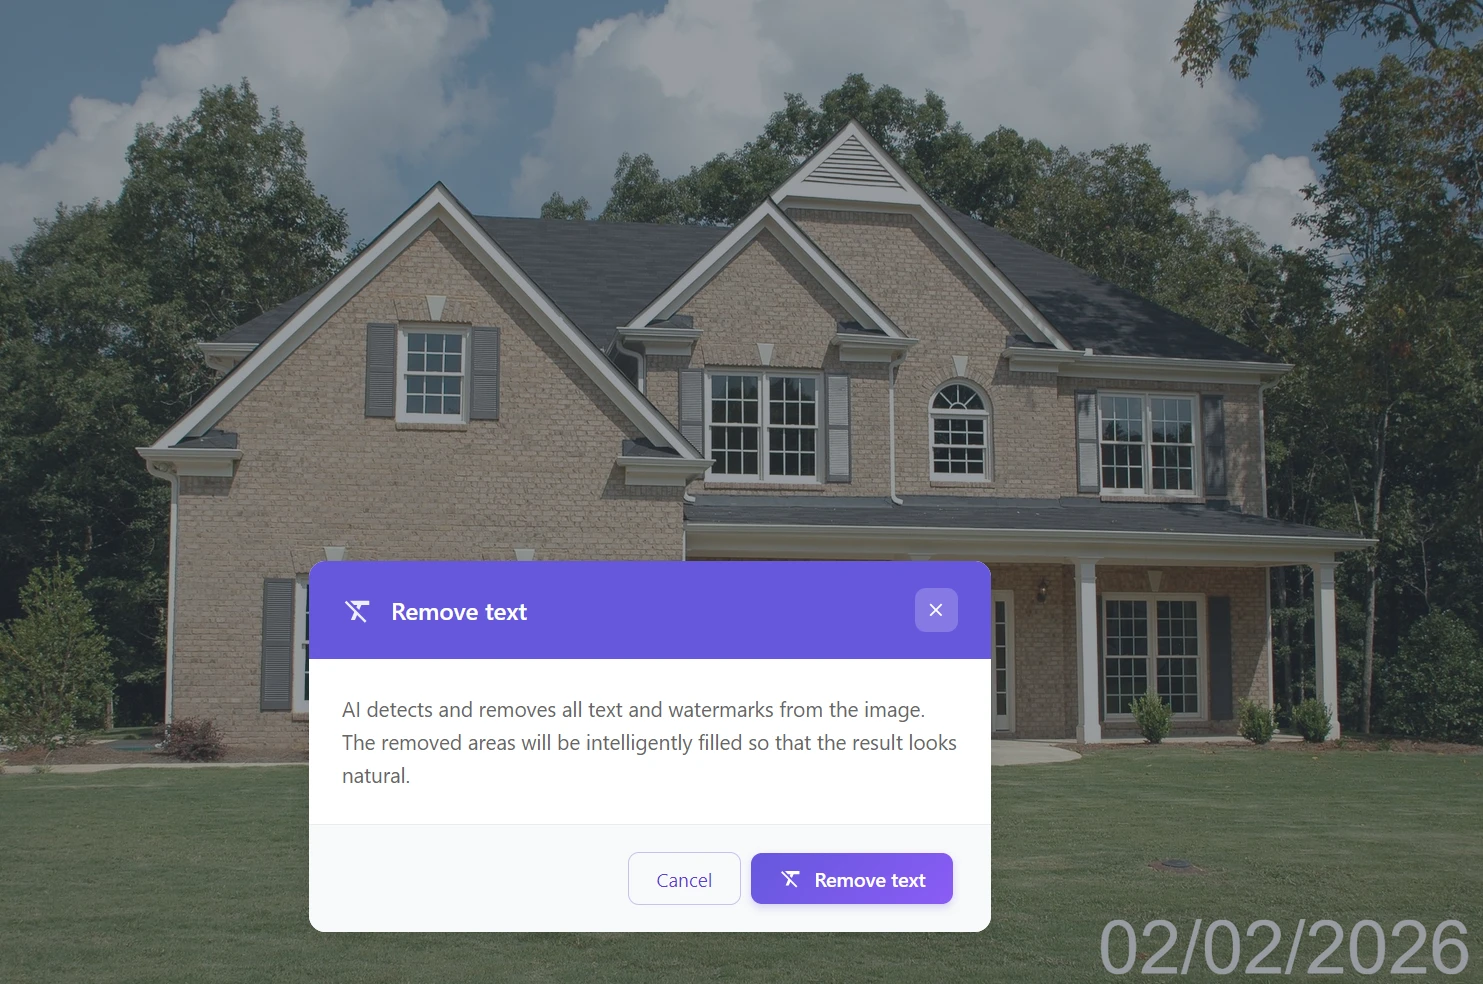
Method 1: Automatic Text Removal – One Click
The fastest way. Ideal for classic date stamps with clear color and contrast against the background – typically red or orange numbers on grass, sky, or a facade.
How to do it:
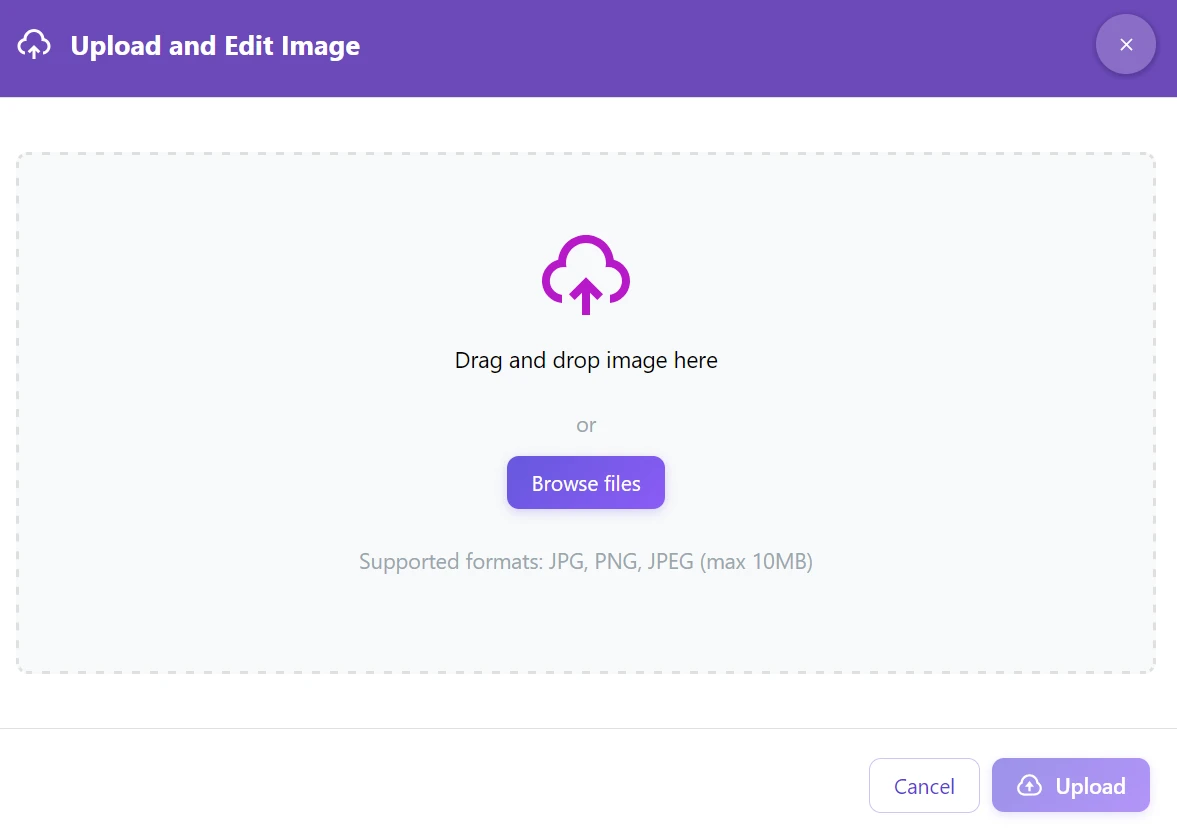
Step 1: Upload your photo to the GuideGlare image editor
Step 2: In the AI tools menu, click “Remove Text”
Step 3: AI automatically detects the sequence of numbers, erases it, and fills it in with the surrounding texture
Cleaning an entire album? Process photos one by one automatically
If you have dozens of photos from a holiday or family event with the same date stamp, you don't have to deal with each one manually. Automatic text detection can clean images quickly one after another – without marking, without prompts, without unnecessary clicks. Open a photo, click "Remove Text", download the result, then move to the next.
Method 2: Inpainting – Precise Brush Control
When the date blends with the background, is faded (in scanned photos), or lies on a very complex texture (gravel, leaves, patterned carpet, a face), automatic detection might miss or overshoot the target. Here, it’s better to take the brush into your own hands.
How to do it:
Step 1: Upload the image to GuideGlare AI
Step 2: Select the “Inpaint Area” (Inpainting) tool
Step 3: Set the brush size and paint over the date. You don’t need to be surgically precise – just cover the area.
Step 4: In the prompt, write an instruction, for example “Blend with background” or “Remove date”

Step 5: Click “Perform Inpainting”


Is the date over a face or an important detail? Mark slightly more, not less
When working with the brush, we instinctively mark only the exact date. But AI works better when it has a little extra context. Mark an area slightly larger than the date itself – AI will then better understand what texture to generate, and the transition will be more natural. Especially with skin, hair, or delicate patterns, this makes a visible difference.
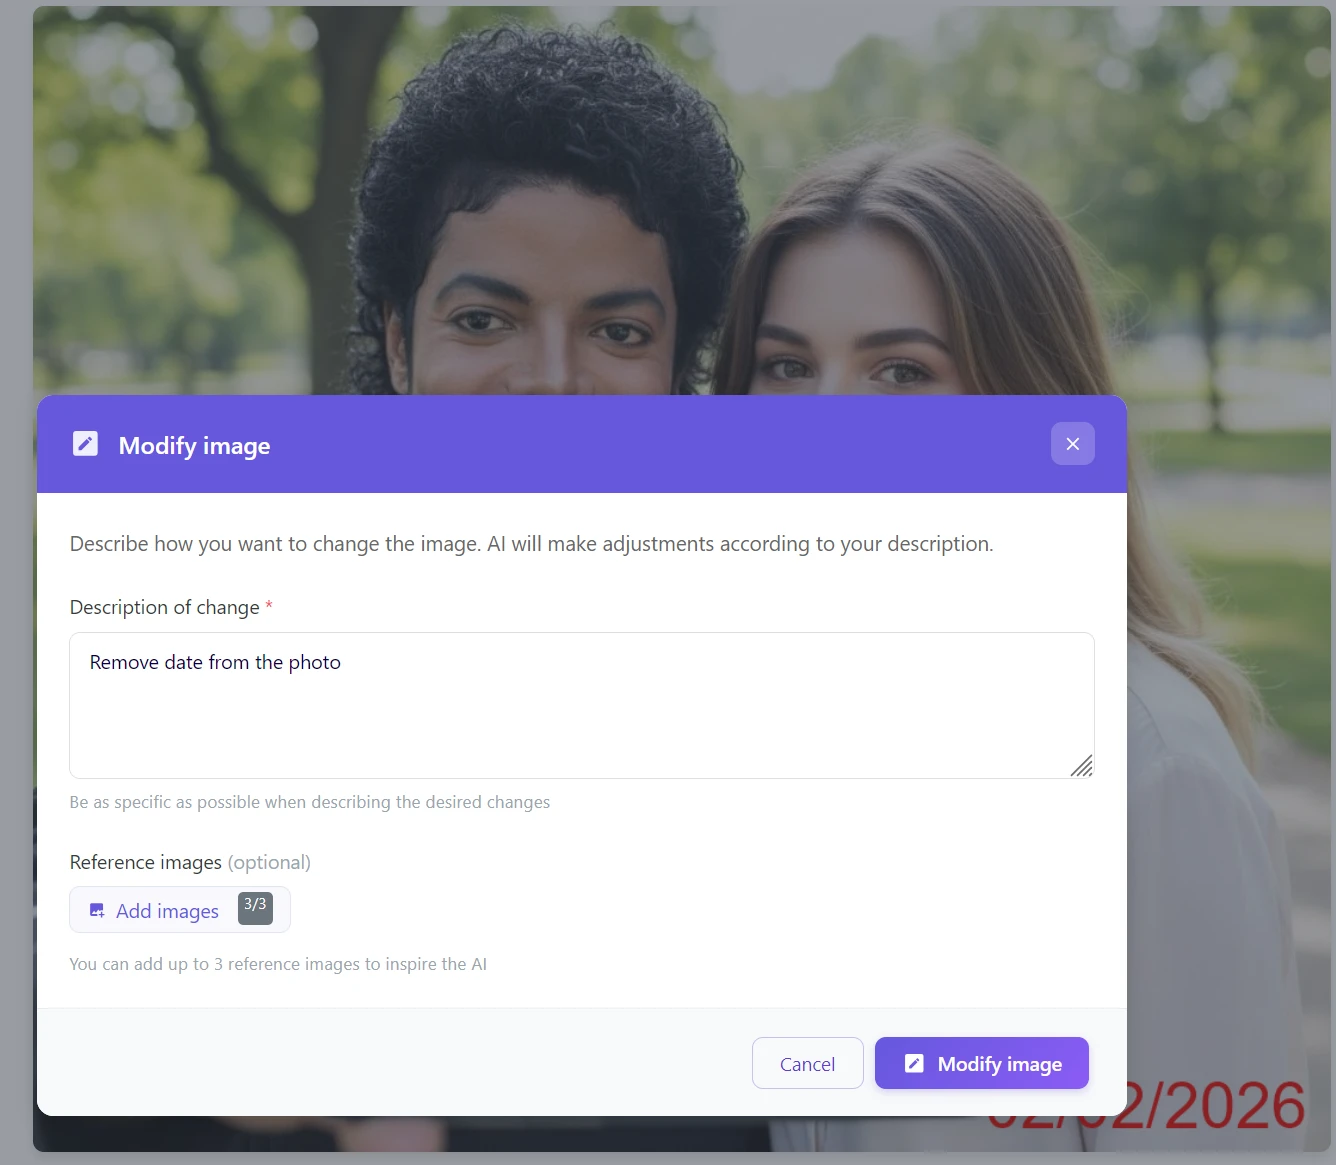
Method 3: Text Command – Tell AI What to Do
The most intuitive approach for those who don’t want to mark anything with a mouse. You write an instruction, and AI takes care of the rest – as if you were giving a task to a graphic designer.
How to do it:
Step 1: Click on the “Modify Image” tool
Step 2: In the text field, type a command in natural language: Remove date from the photo
Step 3: AI recognizes the distracting element and modifies the photo without further intervention
Write in Czech or English? Both work
GuideGlare's AI understands natural language – whether you write "Odstraň datum z fotky" (Remove date from the photo) or "Remove date from the photo", the result will be the same. If you want to be more specific, add color or position: "Remove the red date in the bottom right corner." The more precise the instruction, the less room for misinterpretation.
Which Method is Right for You?
| Method | Ideal Use | Difficulty |
|---|---|---|
| Automatic (Remove Text) | Quick cleaning of entire albums, prominent contrasting date | ⭐ (1 click) |
| Text Command (Modify Image) | Date clearly separated from the main object | ⭐⭐ (writing a sentence) |
| Inpainting (Inpaint Area) | Scanned photos, faded stamps, complex backgrounds, faces | ⭐⭐⭐ (brush stroke) |
Golden Rule: Is the date prominent and contrasting? → Automatic. Do you want precise control or a complex background? → Inpainting. Don’t want to mark anything? → Text Command.
Save Your Digital Memories
Those photos from 2005 deserve to look great. Don’t let the technical limitations of old digital cameras mar your most precious moments.
With GuideGlare, open your digital archive and, in a few minutes, turn it into a gallery of clean images suitable for printing, sharing, and gifting. And if you want to not only clean old photos but also restore colors or repair damage, GuideGlare can do both.
Try removing a date from a photo for free
Upload your old photo and see how AI erases the date stamp and naturally fills in the background. It works in your browser, no installation required.
Frequently Asked Questions
Can AI also fill in complex backgrounds, such as a face or hair?
Yes. Generative AI doesn’t just blur, but genuinely regenerates missing facial features, skin, or hair so that the result looks natural. For these cases, we recommend the Inpainting method – there you have full control over which area AI regenerates, and the result will be the most accurate.
Does it also work on analog scanned photos?
Yes. Many old film cameras had a “Data back” function that burned the date directly onto the negative (typically yellow or red digits in the corner). AI handles this just as well as digital dates – however, in this case, we recommend the Inpainting method, because faded or discolored stamps on old paper tend to be harder for automatic detection to pick up.
What if AI removes a part of the image I want to keep?
If automatic detection removes more than you want, switch to the Inpainting method. There you have 100% control over exactly what you mark for deletion – and AI will only modify the part you marked with the brush.
Is the original photo resolution preserved after removing the date?
Yes, GuideGlare works at the original file resolution. If you want to maximize sharpness for printing or large-format use after editing, we recommend further processing the result with the Upscale Resolution function.
How long does the processing take?
Automatic text removal is the fastest – usually within 10 seconds. Inpainting and text commands typically take 10–30 seconds, depending on the file size and background complexity.
Can I further edit the photo after removing the date?
Yes, and it’s the recommended procedure. After cleaning the date stamp, you can, for example, colorize or restore the photo, upscale the resolution, or adjust the mood. GuideGlare tools function as a workflow – each step builds on the previous one.