AI Photo Restoration: Save & Colorize Old Photos
Your family history lies in an attic box
You found an old box in the attic. Inside, dozens of photos of your grandparents, great-grandparents, people you never knew, but whose DNA you still carry.
But the photos are damaged. Scratches, stains, cracks in the paper. Some are so faded that faces are almost indistinguishable. Others are only in black and white, so you’ll never see the color of your great-grandmother’s eyes.
And what’s worse? It gets worse every year. Paper becomes brittle, inks fade, memories disappear.

Why old photos hurt us so much
It’s not just about paper and ink. It’s about people.
Every scratch on a photo is a piece of history you could lose forever. Every faded face is a family member your children might never see clearly.
And time doesn’t wait. These photos are already 50, 80, maybe 100 years old. In another 20 years, they might be completely unreadable.
What if you could turn back time? What if those old, damaged photos could look like new? What if you could see your great-grandmother in the colors she saw herself?
How AI saves family memories
Restoring old photographs used to be a job for specialists, requiring hours of manual work and hundreds of euros for a single photo.
Today, an AI image editor can do it in seconds.
What can AI photo restoration do?
Modern algorithms are not just “filters”. They are intelligent systems that:
- Recognize damage – scratches, stains, cracks
- Fill in missing parts – reconstruct textures beneath the damage
- Sharpen details – faces, eyes, hair regain clarity
- Add colors – analyze context and add natural color tones
- Increase resolution – transform low quality into HD
The result? A photo you can frame, print in large format, or show your children on a tablet. A photo that looks like it was taken yesterday.
How to restore old photos using AI
Phase 1: Preparing the photo
Step 1: Digitize the old photo
You have two options:
📱 Take a photo with your mobile:
- A quick solution for initial attempts
- Place the photo on a flat surface
- Use natural light (by a window)
- Avoid glare and shadows
- Shoot perpendicularly from above
🖨️ Scan (recommended):
- Higher quality result for permanent preservation
- Ideal resolution: 300+ DPI
- You can use a copy center, library, or ask a family member with a scanner
- A scanner captures more details than a mobile phone
💡 Tip: Even if the photo looks very bad, scan it. AI can extract a surprising amount of detail from a low-quality scan.
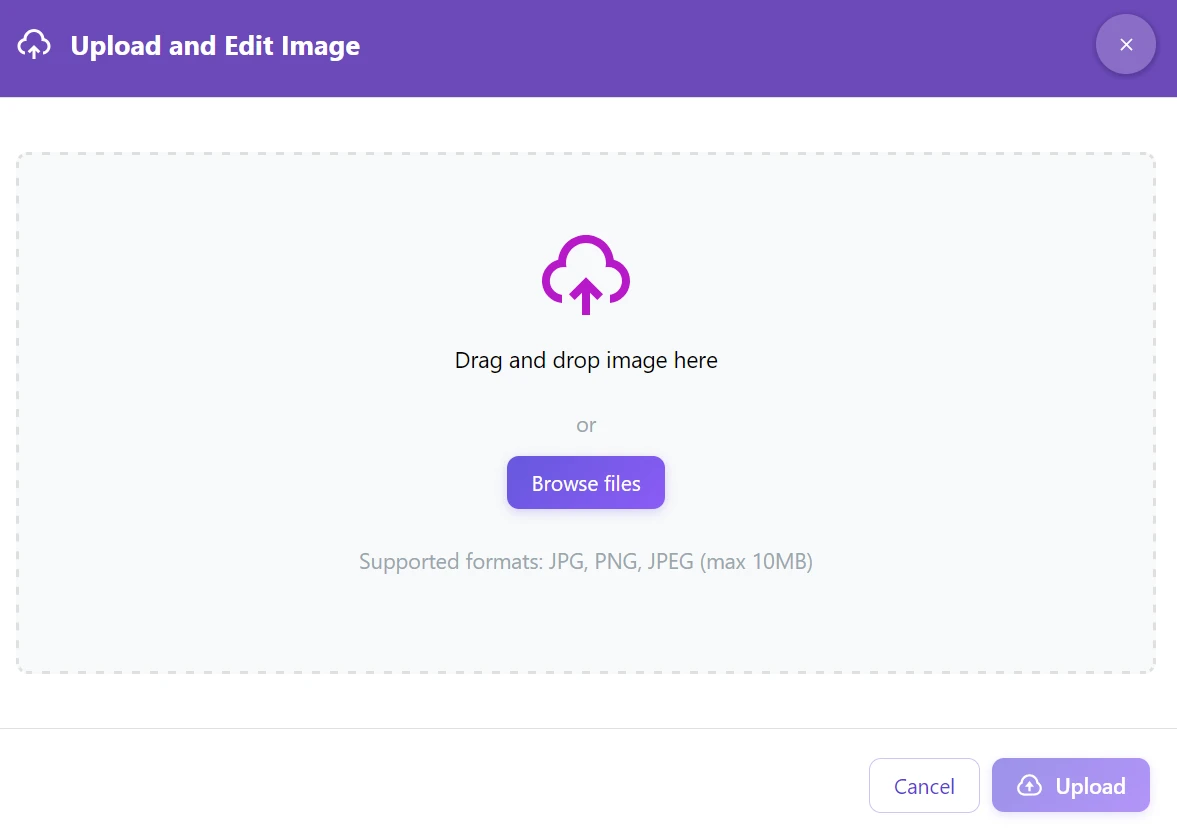
Step 2: Upload the photo to GuideGlare
- Drag and drop the file into the upload area
- Or click “Browse files”
- Supported formats: JPG, PNG, JPEG (max 10MB)
Phase 2: Removing damage
Step 3: Select “Edit with AI” → “Restore damaged image”
This step can be skipped; it’s optional, especially if:
- Your intention is to colorize the final photo.
- The photo is not too damaged.
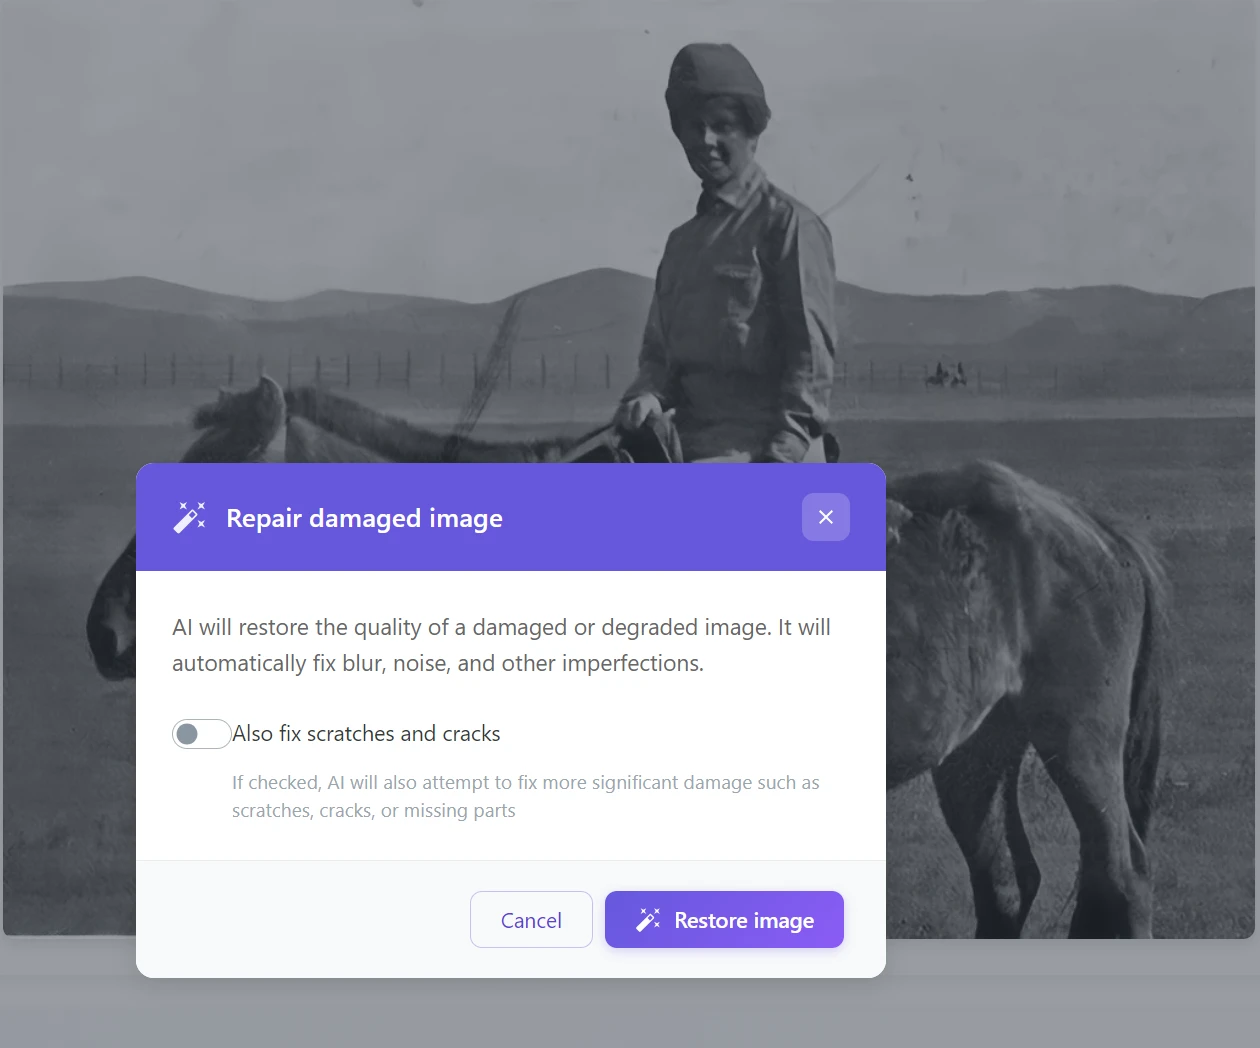
This tool automatically:
- ✅ Removes scratches and cracks
- ✅ Fills in missing parts
- ✅ Unifies textures
- ✅ Removes stains and dirt
💡 Tip: If the photo has very extensive damage (e.g., an entire piece is missing), first use “Inpaint Area” – use a brush to mark the damaged part, and AI will fill it in.
Phase 3: Colorization
Here comes the magic.
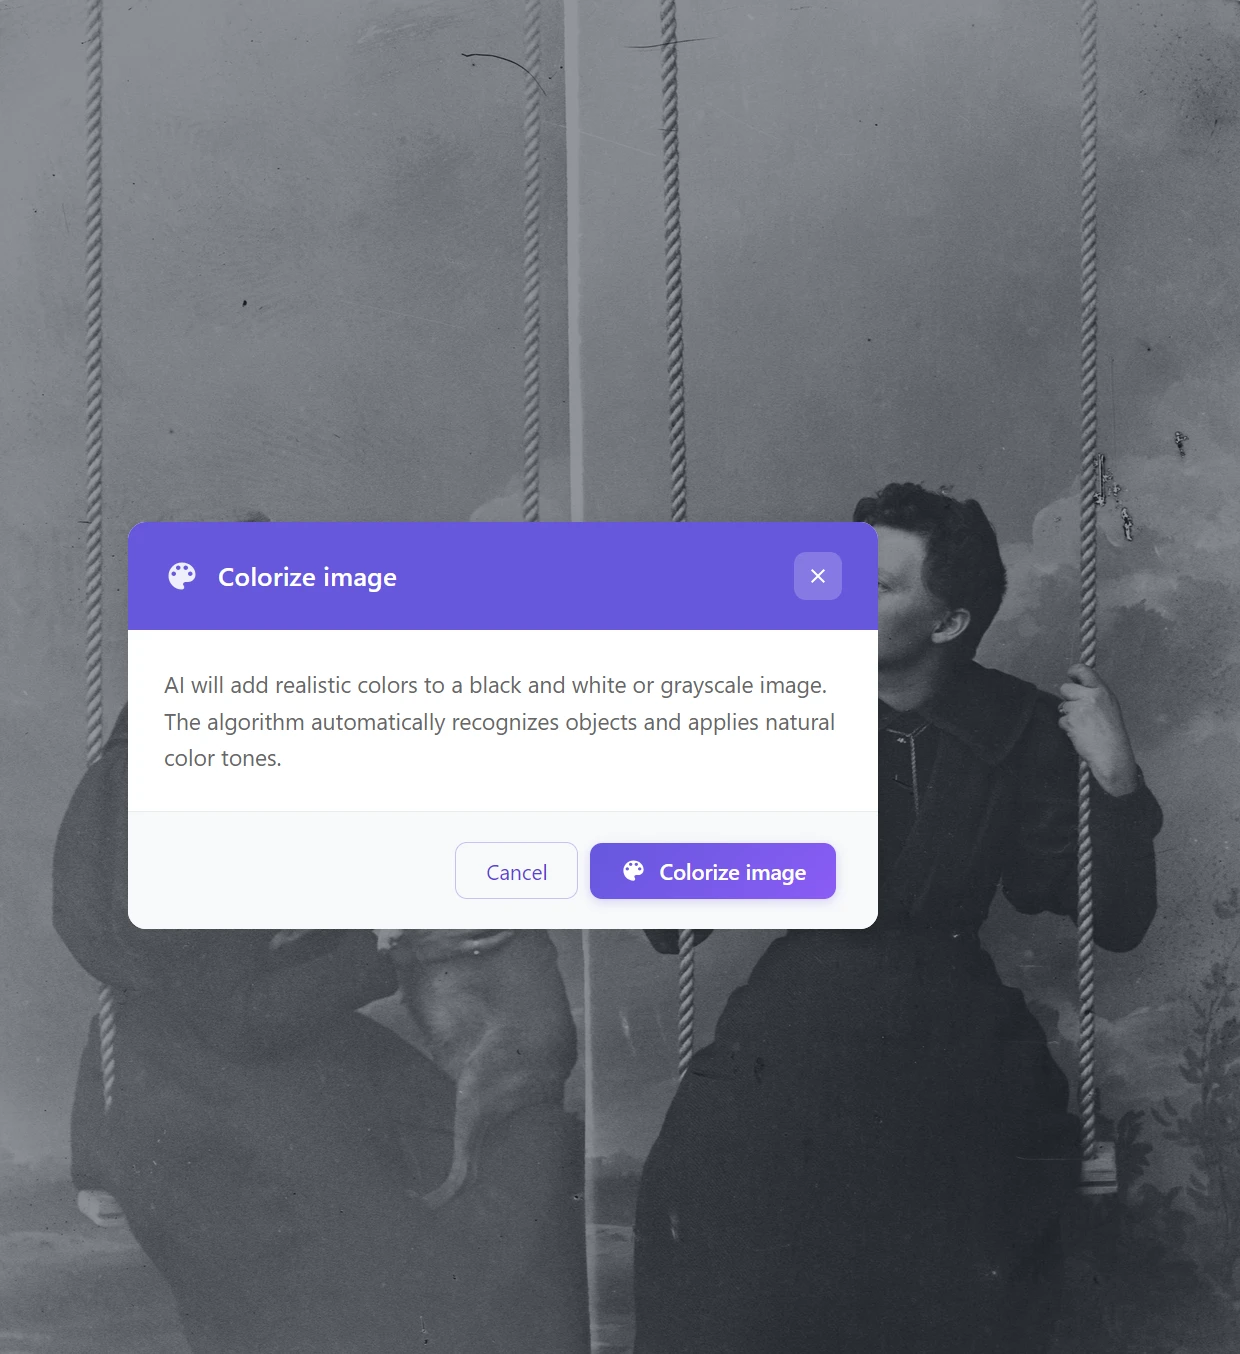
Step 4: Click “Colorize image”
AI algorithm:
- 🎨 Analyzes objects in the photo (faces, clothes, nature)
- 🌈 Assigns natural color tones to them
- 💡 Respects historical context (e.g., period clothing)
💡 Note: The colors are not 100% accurate (AI doesn’t know the actual colors of the objects), but they are very natural and realistic. Often, they are surprisingly close to reality.
Phase 4: Quality enhancement
Step 3: Use “Upscale Resolution”
This step:
- 📈 Increases resolution up to 4x
- 🔍 Sharpens facial details
- ✨ Improves overall readability of the photo
Ideal for: Photos you want to print in large format or frame.
Not sure how to do it? Read our article on how to upscale photo resolution using AI.
💡 Note: Upscaling resolution is especially important if you took the photo with a mobile phone instead of scanning it. AI photo editor can turn a mobile photo into print-suitable quality.
Phase 5: Final adjustments (optional)
Step 6: If you want to further refine the image to perfection, you can:
- Inpaint Area – to fill in missing parts of the background or manually retouch parts of the image
- Change Image – to remove specific defects (e.g., “remove a large stain on the left”). You can also use the Change Image function as a shortcut to restore a photo if you don’t care too much about the veracity of the result.
Practical restoration examples
Family portraits from the 1920s
Steps used:
- Restore damaged image (scratches)
- Upscale resolution (facial details)
- Colorize image (adding colors)
Result: Photo ready for printing or framing.
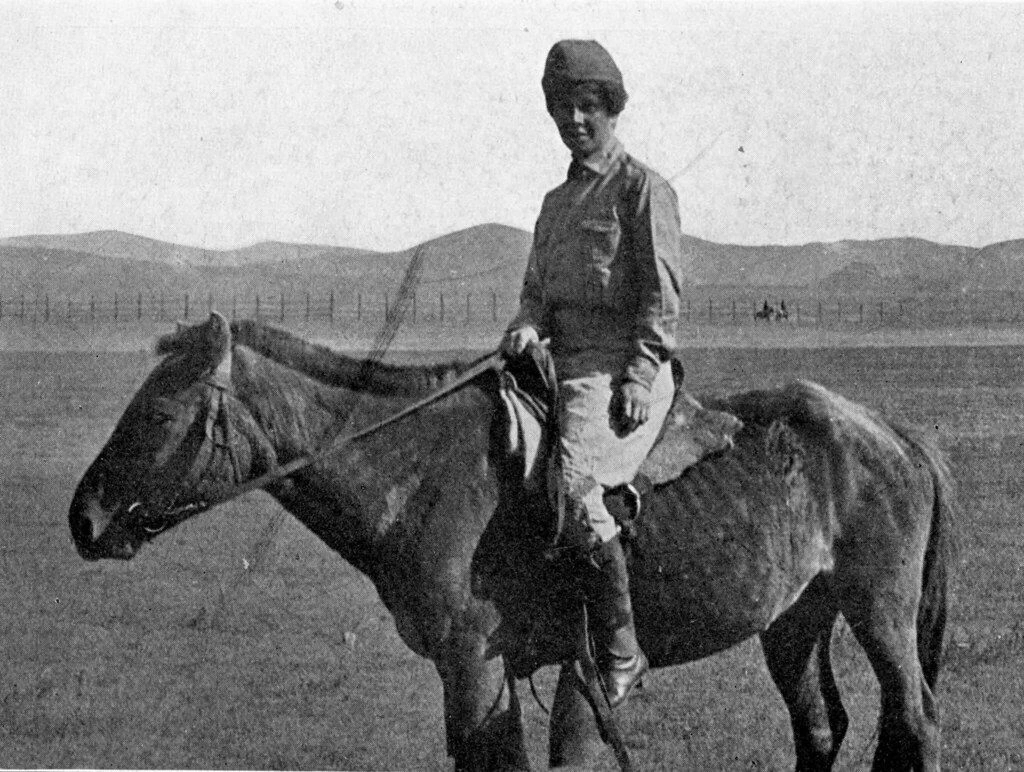
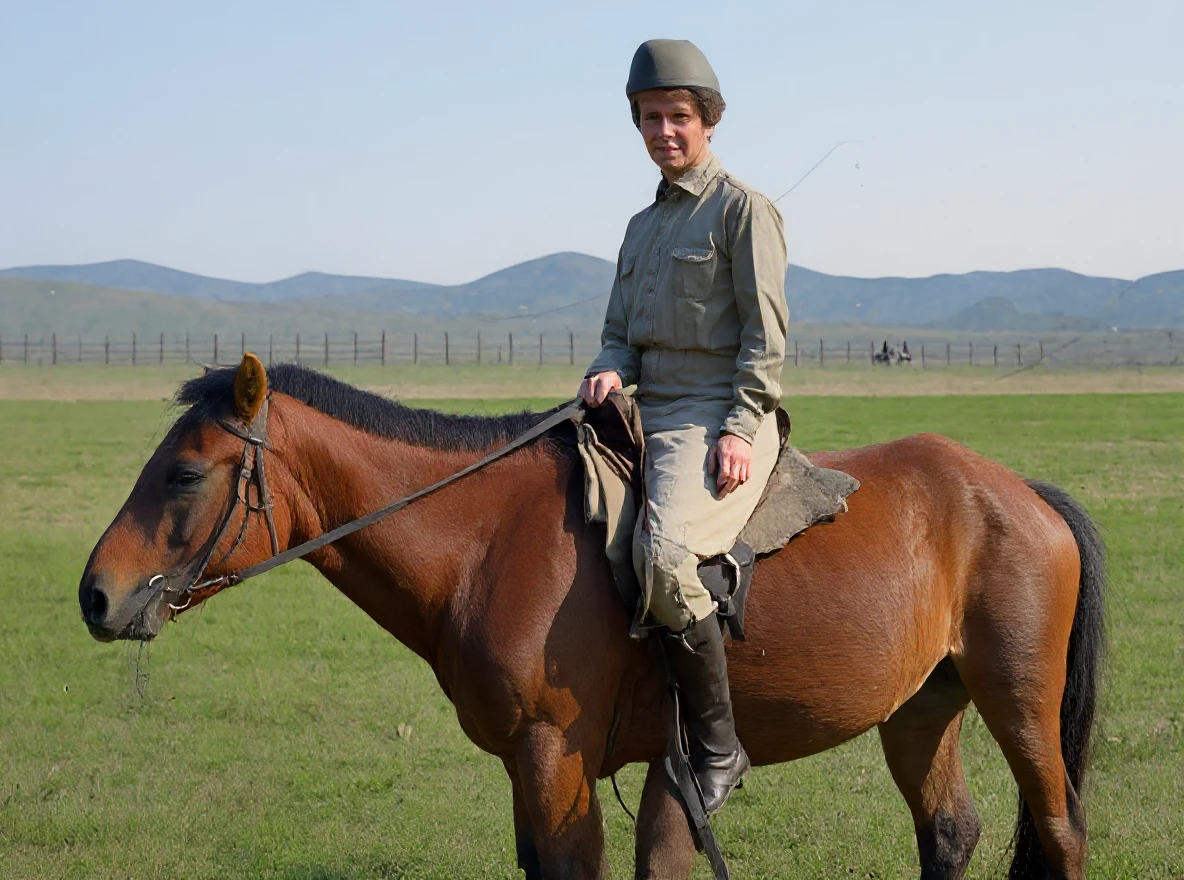
Historical documentary photographs
Steps used:
- Restore damaged image
- Upscale resolution (landscape and details)
- Colorize image
Bonus: You see the color of the landscape, the horse, the clothing – the photo comes to life.
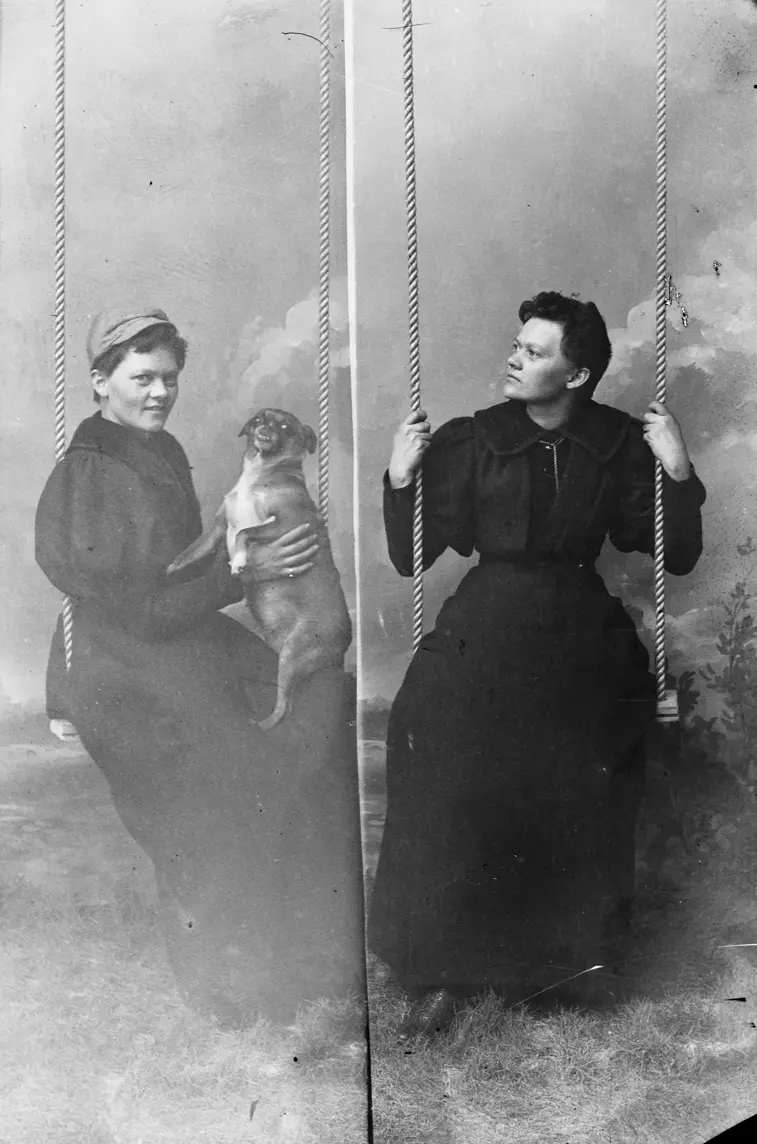
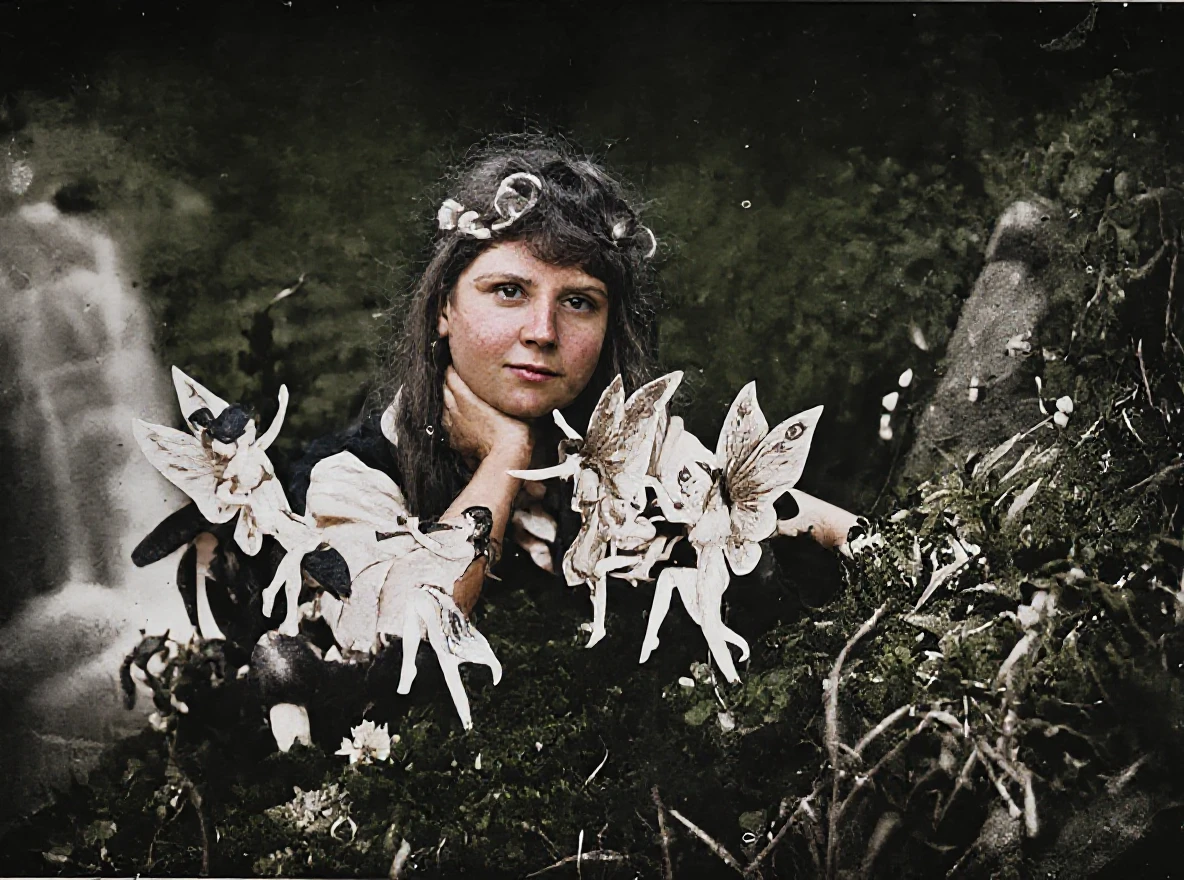
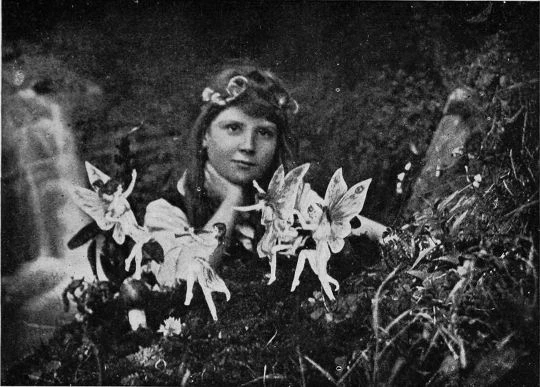
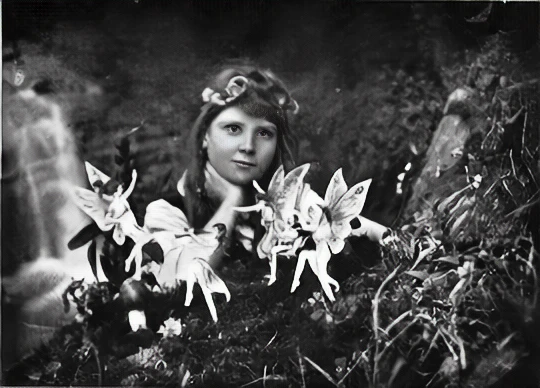
Artistic and creative photographs
In this case, only AI colorization of the photo was used. Notice that the colors are somewhat faded. This is so that they correspond more credibly to reality. If you want the photo to be prettier, you can again use the Change Image function.
Restoration without colorization: When you want to preserve the original black and white character
Sometimes the goal is not to add colors – you just want to save what was there. An original black and white photo has its own character and atmosphere that you don’t want to disturb. In these cases, it’s enough to use only **“Restore damaged image” and Upscale photo resolution.
Steps used:
- Restore damaged image (scratches, stains)
- Upscale resolution (sharp details of face and background)
When to choose this approach: You have a photo with artistic or documentary value where authenticity matters to you. Or you simply prefer the classic black and white look.
Restoration without colorization: Saving details from a damaged landscape
The same approach works great for landscape photos or group shots where large areas of the background are damaged.
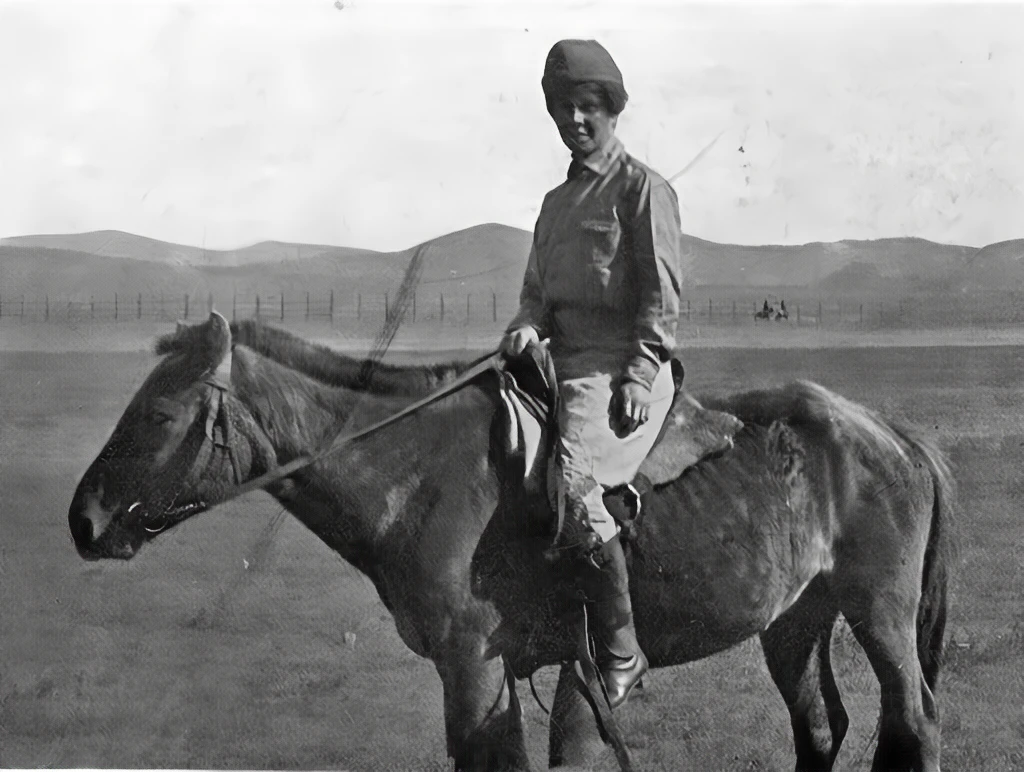
Steps used:
- Restore damaged image (scratches across landscape and figure)
- Upscale resolution (visible mountains in the background, clothing details)
Result: The photo is clean, readable, and ready for digital storage or printing – while retaining its original period expression.
💡 Tip: Restoration without colorization is also a great intermediate step – first repair and save the black and white version, and only then decide if you want to add colors. You will always have both variants.
Tips for best restoration results
✅ What works:
1. Start with the best possible digital copy
- A scanner is better than a mobile phone – it captures more details
- The higher the scan quality, the better the result
- 300 DPI or more is ideal
- Mobile photo is OK for quick attempts, but for the final version, use a scanner
2. Proceed step by step
- First remove damage
- Then increase resolution
- Leave colorization for last
3. Save the original scan
- Always keep a backup of the original digital photo
- You can try different approaches
- Never throw away the original physical photo!
4. Try individual steps several times
- AI image editing is not always perfect on the first try
- You can try different combinations of tools
- If you’re shooting with a mobile phone, try different lighting and angles
5. Don’t just scan the “pretty” photos
- Even very damaged photos can have surprising results
- You never know what AI can save
- Rather scan everything – a digital copy doesn’t take up space
Common mistakes:
- Expecting miracles from extremely damaged photos (missing entire parts of a face)
- Skipping the “Upscale Resolution” step before printing
- Colorization before removing scratches (scratches will then be color-highlighted)
- Taking mobile photos in poor lighting with glare
- Low scan resolution (below 200 DPI)
When to use which tools?
| Type of damage | Tool |
|---|---|
| Scratches, stains, cracks | Restore damaged image or Inpaint Area |
| Low quality, blur | Upscale Resolution |
| Black and white → colors | Colorize image |
| Large missing parts | Fill area (brush) |
| Faded colors in old color photos | Edit image + prompt “enhance colors” |
| Mobile photo with low resolution | Upscale Resolution (2x+) |
| Preserving black and white character | Restore damaged image + Upscale Resolution |
Why it’s important to restore old photos now?
Time is not kind to old photos
Every year:
- Paper yellows and becomes brittle
- Colors (in old color photos) fade
- Scratches grow larger
- Humidity and light cause further damage
In 10-20 years, some photos may be completely unreadable.
Digitization = backup for eternity
Scanned and restored photos:
- Cannot be destroyed by fire or flood
- Do not deteriorate over time
- You can share them with the whole family
- Back them up to the cloud
- Print repeatedly without loss of quality
Preservation for future generations
Your children and grandchildren will never know your grandparents. Photographs are the only connection.
Restored and printed photos can be:
- Framed and hung at home
- Used to create a family photo album
- Stored digitally and backed up
- Given as a gift to family
Emotional value
When you see your great-grandmother in color for the first time in your life, it’s not just a photo. It’s an encounter.
Suddenly you see that she had blue eyes. That she wore a green dress. That she smiled just like your daughter.
Start restoring your family memories
Those old photos in the attic are not just paper. They are stories. They are people who lived, laughed, had dreams – just like you.
And they deserve more than just gathering dust in a box.
With AI photo editing tools, you can in minutes:
- ✨ Remove scratches and damage
- 🔍 Enhance quality for printing
- 🎨 Add colors to black and white photos
- 💾 Save them digitally for future generations
You don’t have to be a photographer or an expert. Just scan the photos (or take a picture with your mobile), upload them to GuideGlare, and let AI do the rest.
🚀 Start restoring old photos with AI GuideGlare
A complete set of AI image editor tools is available to you in one subscription:
colorization and photo restoration
photo editing (including inpainting area)
resolution upscaling
Frequently Asked Questions
How much does it cost to restore one photo?
With GuideGlare, you don’t pay for each individual photo; instead, you have a monthly subscription. This is a huge advantage over traditional methods, where the cost of manual retouching for one photo can climb to hundreds or thousands of crowns. Within the subscription, you gain access to tools and a certain number of credits for processing any number of photos.
This model is ideal if you want to save an entire family archive. Instead of having to choose only the “best” shot, you can gradually bring dozens of photos back to life – remove scratches, repair cracks, sharpen faces, and add colors to your family’s entire story.
Practical tip: If you have a whole box of photos at home, start with the ten most important ones. On these, you’ll try out the entire process from scanning to final adjustments. Once you’re confident with the procedure, you’ll tackle the rest of the archive much more efficiently.
Do I have to scan photos, or is a mobile photo enough?
Both are possible, but each method is suitable for a different purpose.
- Taking photos with a mobile phone is great for quick testing and immediate results. Do you want to see right now how artificial intelligence will repair a damaged photo or what a black and white photo colorization will look like? A mobile phone is perfect. For the best result, shoot perpendicularly from above, in good daylight, and without glare.
- Scanning is the best choice for final archiving and printing. A scanner captures far more detail and fine textures, giving AI a higher quality basis for its work. The result will be a sharper image, ideal for upscaling resolution, sharpening faces, and subsequent large-format printing.
Recommendation: For quick sharing on social media or in a family chat, a good quality mobile photo is often sufficient. For the most valuable images you want to frame or save for future generations, the time investment in scanning at 300 DPI or more is definitely worth it.
Where can I have photos scanned?
There are several options today, and they don’t have to be expensive:
- Copy centers and print studios: They are fast, professional, and can handle various formats. They usually send you the files directly by email.
- Public libraries: Many libraries offer publicly accessible scanners, often for a symbolic fee or even free.
- Photo studios and photo labs: They are specialists in working with photographs, so the scan quality is usually excellent.
- Family and friends: Ask around. Many people have a multifunction printer with a scanner at home, which is perfectly sufficient for digital archiving family photos.
What to watch out for: Always ask for a scan at a resolution of at least 300 DPI and save it in JPG or PNG format. For small portrait photos where you want to capture maximum detail in the face, a resolution of 600 DPI is ideal.
How good does the scan quality need to be?
The basic rule is: the higher the quality of the input image, the more impressive the restoration result will be.
- 300 DPI is the gold standard for most family photos. It provides AI with enough data to reconstruct details without the file being too large.
- 600 DPI is ideal for very small photos (e.g., 6x9 cm) or if you plan to print in a large format and want to “pull out” every detail from the photo.
Important clarification: It is not necessary to scan at extreme resolutions that create huge files. Artificial intelligence can better handle a quality scan of a reasonable size than a low-quality but giant photo. When taking photos with a mobile phone, the most important thing is sharpness and good light without shadows and glare.
Does it work on very damaged photos?
Yes, but with certain limits. It’s important to know where AI excels and where it has to “guess.”
AI usually handles very well:
- Removing scratches, cracks, and dust.
- Repairing water stains or other impurities.
- Smoothing wrinkled paper and unifying texture.
- Restoring slightly faded colors and contrast.
Where results may be less accurate:
- If a large part of the photo is missing, for example, half a face. AI will try to infer the missing part, but the result may not correspond to reality.
- With extremely blurry or out-of-focus photos where basic information about shapes is missing.
For these complex cases, it’s ideal to combine tools: first use “Restore damaged image” and then use the “Inpaint Area” tool to manually mark the missing areas for AI to fill in.
Are the colors accurate after colorization?
Colorization using AI is not a time machine, but rather an intelligent reconstruction. Artificial intelligence doesn’t know the color of your great-grandmother’s dress, but it can make a very educated guess.
It works by the algorithm:
- Recognizing objects in the photo (faces, trees, buildings, clothing).
- Assigning color tones that are typical for those objects and the historical period.
- Considering lighting conditions and striving for a natural and credible result.
The resulting colors are therefore realistic and historically plausible, not necessarily 100% accurate. However, it often happens that the result is surprisingly close to reality and gives the photo a completely new life.
Can I also restore color photos from the 70s, 80s, or 90s?
Yes, and it is precisely with these photos that the results are fantastic. Older color photographs often suffer from specific problems, such as:
- Fading and color shift: Colors lose saturation and often shift to red or yellow hues.
- Loss of contrast: The entire photo appears “grayish” and dull.
- Minor scratches and dust from decades of storage.
Recommended procedure for reviving color photos:
- First use “Restore damaged image” to clean up scratches and impurities.
- Then use “Edit image” with a text prompt like “restore faded colors and enhance contrast” or “return the photo to its original colors.”
- Finally, you can use “Upscale Resolution” if you want to print the image or view it in high detail.
Will my original photo change?
No, not at all. Your physical photograph remains completely untouched. The entire process takes place with the digital copy you upload to the application. This is the main purpose of digitization – you create a secure digital backup of family memories that does not deteriorate over time and with which you can experiment without worry.
Recommendations for proper archiving:
- Always save the original, unedited scan.
- Next to it, save the restored version (or even multiple versions, e.g., black and white and color).
- For peace of mind, back up your entire archive to an external drive or cloud storage.
How long does it take to restore one photo?
Restoration is surprisingly fast. One step, such as removing scratches, increasing resolution, or colorization, usually takes only 10 to 30 seconds. A complete repair of one photo from start to finish thus takes approximately 1 to 2 minutes.
The speed, of course, depends on the file size and the complexity of the adjustments. Even so, it is true that in one evening you can comfortably restore and revive a significant part of your family photo album.
Do I always have to add colors?
Not at all. Many people prefer to preserve the original atmosphere and authenticity of a black and white photograph. Restoration without colorization is a completely full-fledged result.
This approach is ideal if:
- You want to preserve the historical and artistic value of the image.
- You prefer the classic black and white aesthetic.
- The primary goal is to clean up scratches, repair damage, and sharpen details in faces and the background.
Cool trick: Make both versions. First, perform the repair and upscale the resolution to get a perfect black and white version. Save it. Then, as a next step, try colorization. This way you will have both the authentic original and a revived color variant.