AI Photo Editing: Inpainting & Text Prompts Guide
Change any photo detail – without Photoshop, without a photographer
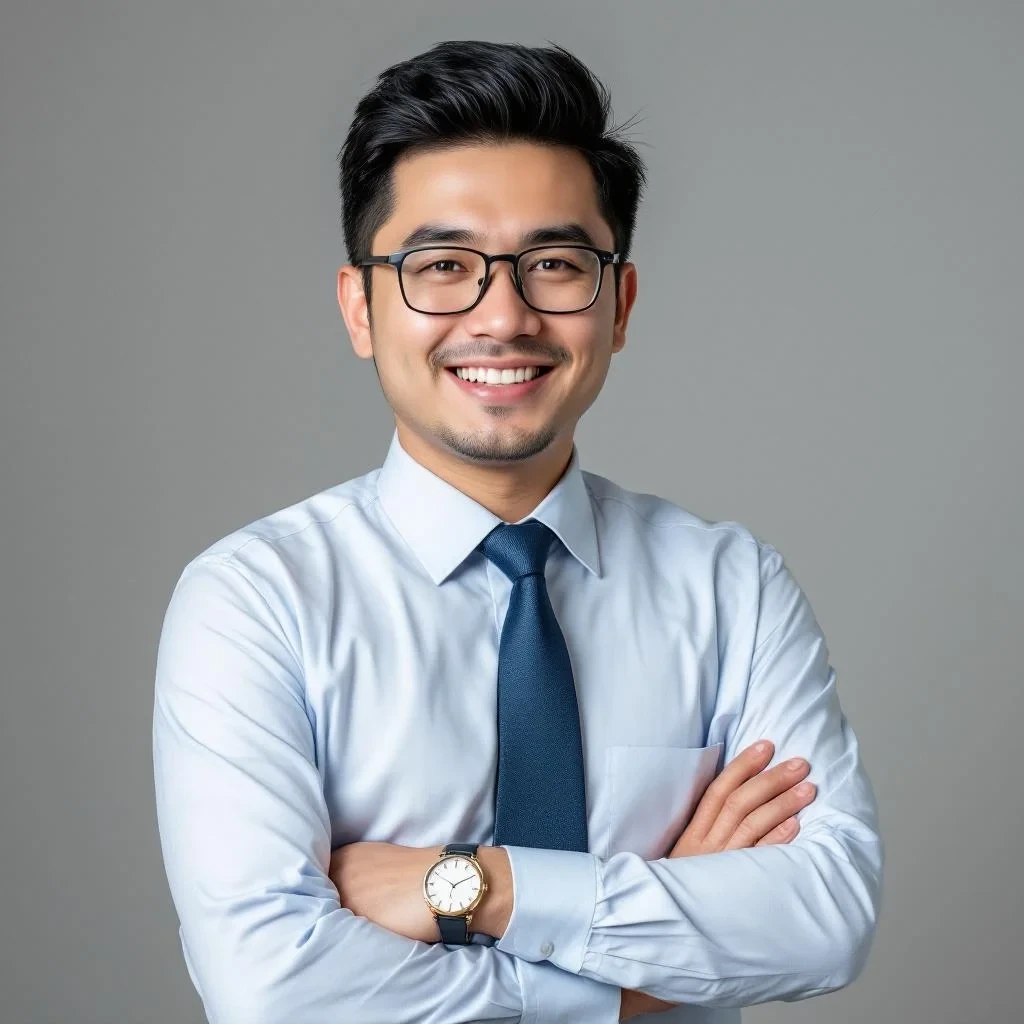
The photo is almost perfect. Only the t-shirt has the wrong color. Or there are glasses that shouldn’t be there. Or you want to add a product to an otherwise empty table.
Previously, this meant either a new photoshoot or hours of work in a graphics editor – layers, masks, cloning, redrawing textures. And the result was still not guaranteed. Today, you just need to type what you want to change, and AI will do it for you.
How AI inpainting works
GuideGlare AI photo editor uses a technology called inpainting (also known as generative fill). Unlike ordinary filters that just paste a layer over, AI analyzes the entire context of the scene – the direction of light, shadows, fabric texture, perspective, and surrounding details. It calculates the new element for the photo so that it looks like it has always belonged there.
The result is not a collage or an overlay. It’s a photo where a specific part looks as if it was captured that way from the start.
What all can you change in a photo?
The possibilities are virtually limitless. The most common scenarios that GuideGlare users address:
Clothing and accessories: replacing a t-shirt with a shirt in a corporate portrait, changing clothing color for a new collection, removing glasses, hats, or jewelry, adding a tie or a scarf.
Product photography: recoloring a product into all available color variants from a single photo while preserving shadows and reflections, replacing a label or tag, changing the background surface.
Background and environment: replacing a busy background with an office or a clean wall, adding objects to the scene (a vase on a table, books on a shelf), adjusting the mood of the lighting.
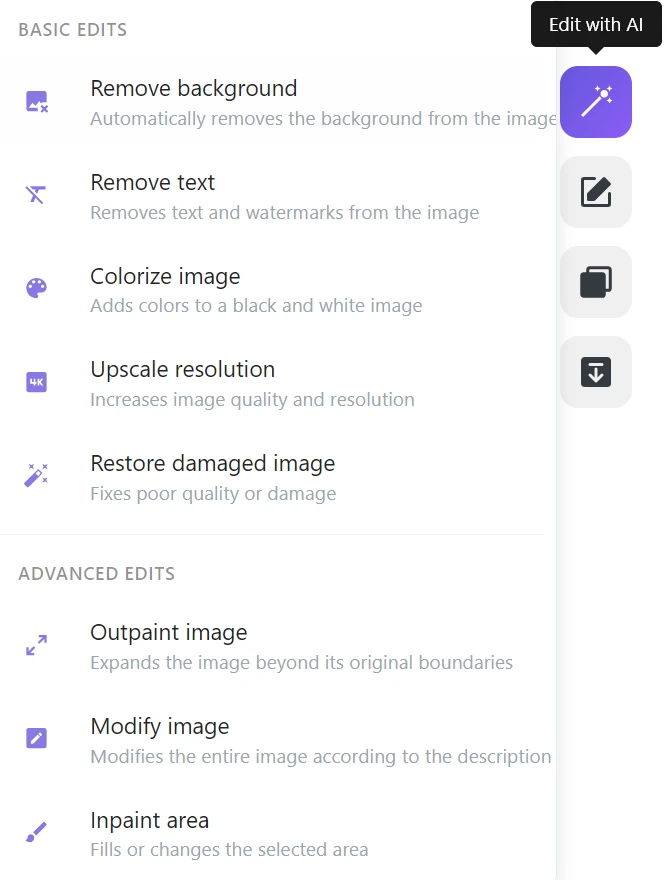
To completely erase an object without replacement, use the AI eraser.

GuideGlare offers two tools for these adjustments: Edit Image (global change by command) and Refine Area (local change by brush).
Method 1: Edit Image – change by text
This is the ideal choice if you can describe the change with a simple sentence. AI analyzes your text command and automatically finds the area to modify – you don’t need to mark anything.
✅ When to use: quick removal or addition of common accessories (glasses, tie), changing the color of clothing or hair, adjusting the overall mood of the photo.
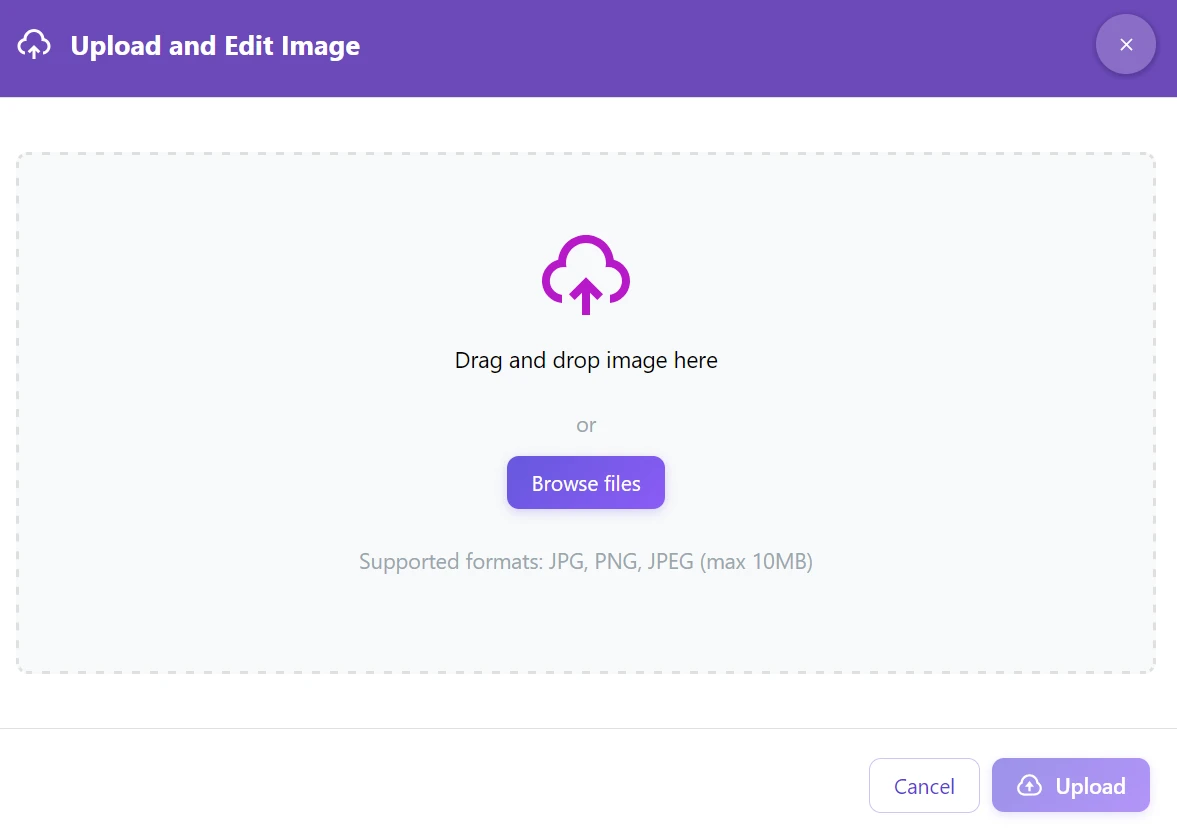
Step 1: Upload your photo to the GuideGlare AI editor.
Step 2: Click on “Edit with AI” → “Change Image”.
Step 3: Type what should happen into the text field.
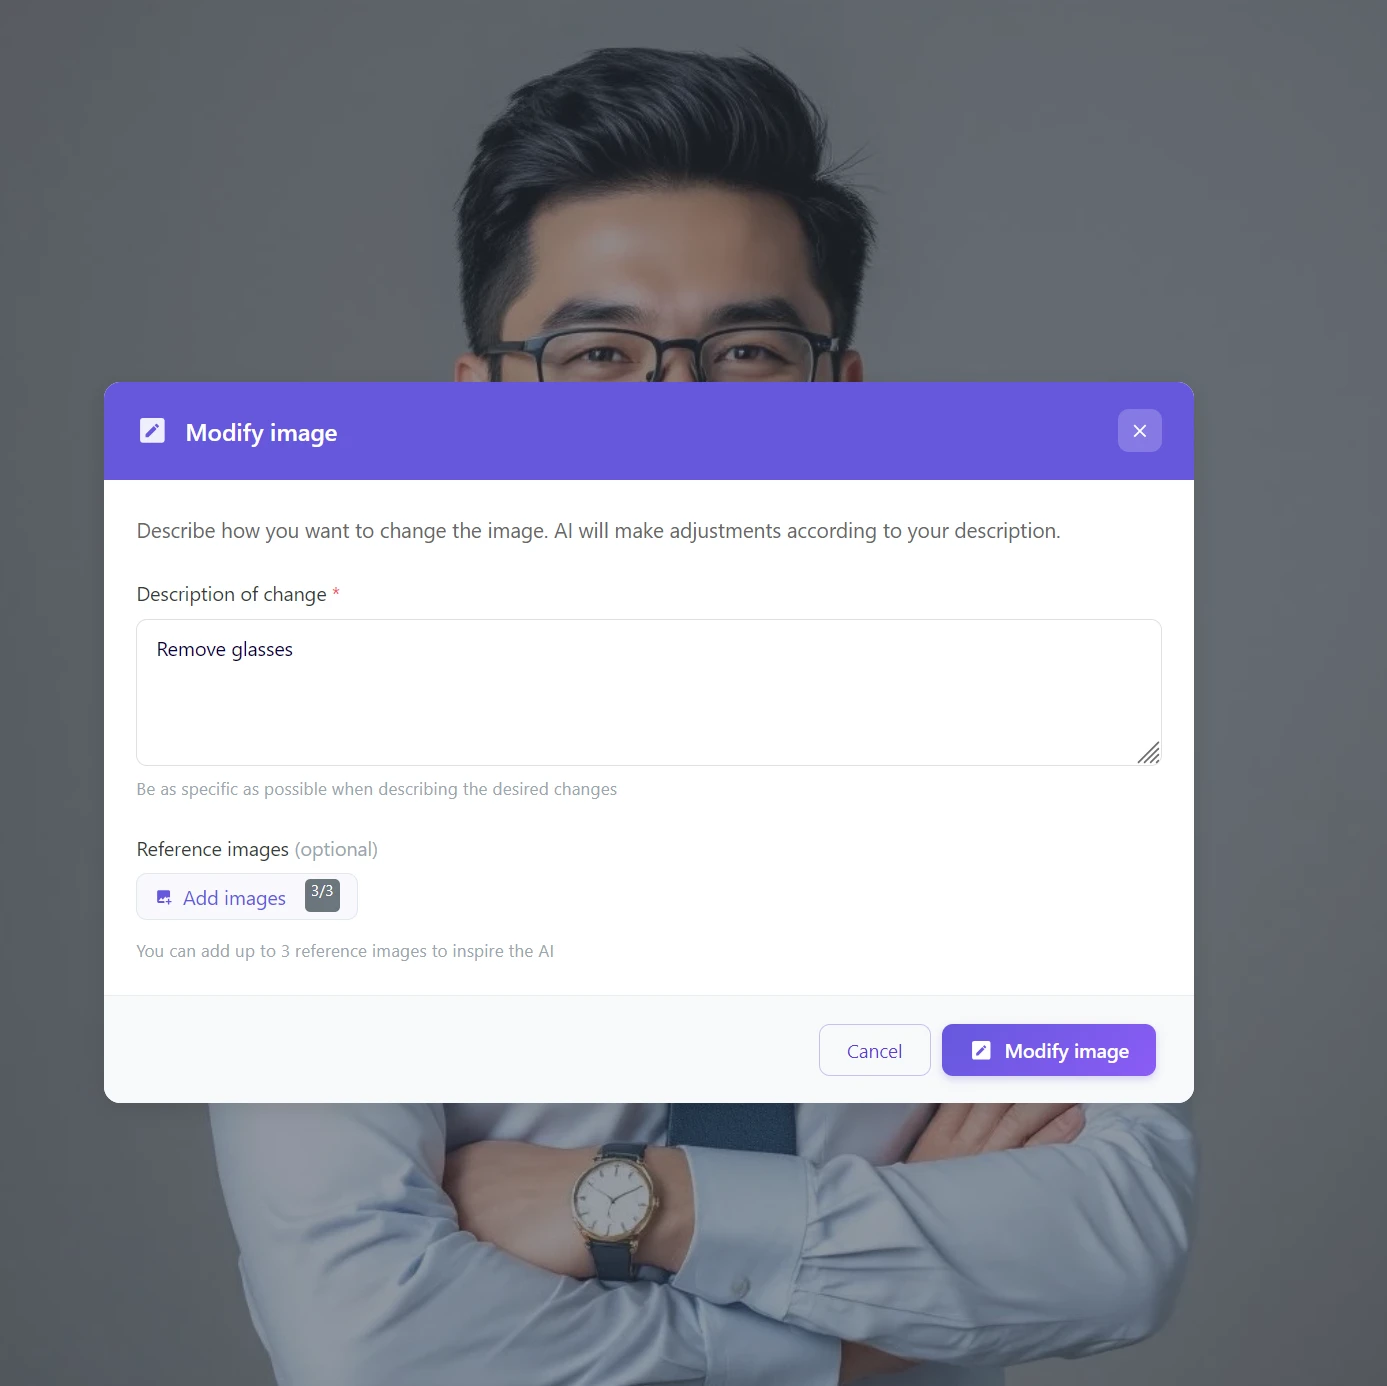
Examples of commands that work: “Change tie to blue”, “Remove glasses”, “Add a full beard”, “Replace background with an office”, “Make the sky more dramatic”.
Step 4: Click on “Edit Image” and wait approximately 15 seconds.
How to write effective prompts
A good prompt tells AI what to change and how it should look. Instead of "edit t-shirt", write "change t-shirt to a white collared shirt". The more specific the description, the more predictable the result. If the result is not exactly what you wanted, try to refine the prompt or add scene context – for example, "in natural daylight".
Method 2: Refine Area – change by brush
Do you need absolute control over where exactly the change occurs? Use the brush to mark the precise area (mask), and the rest of the photo will remain 100% untouched.
✅ When to use: replacing a specific logo or text, adding an object to a specific place (a vase on a table), situations where a text description is insufficient or where precise boundaries of the change need to be maintained.
Step 1: In the menu, select “Edit with AI” → “Refine Area”.
Step 2: Use the brush to paint over the object or area you want to change.
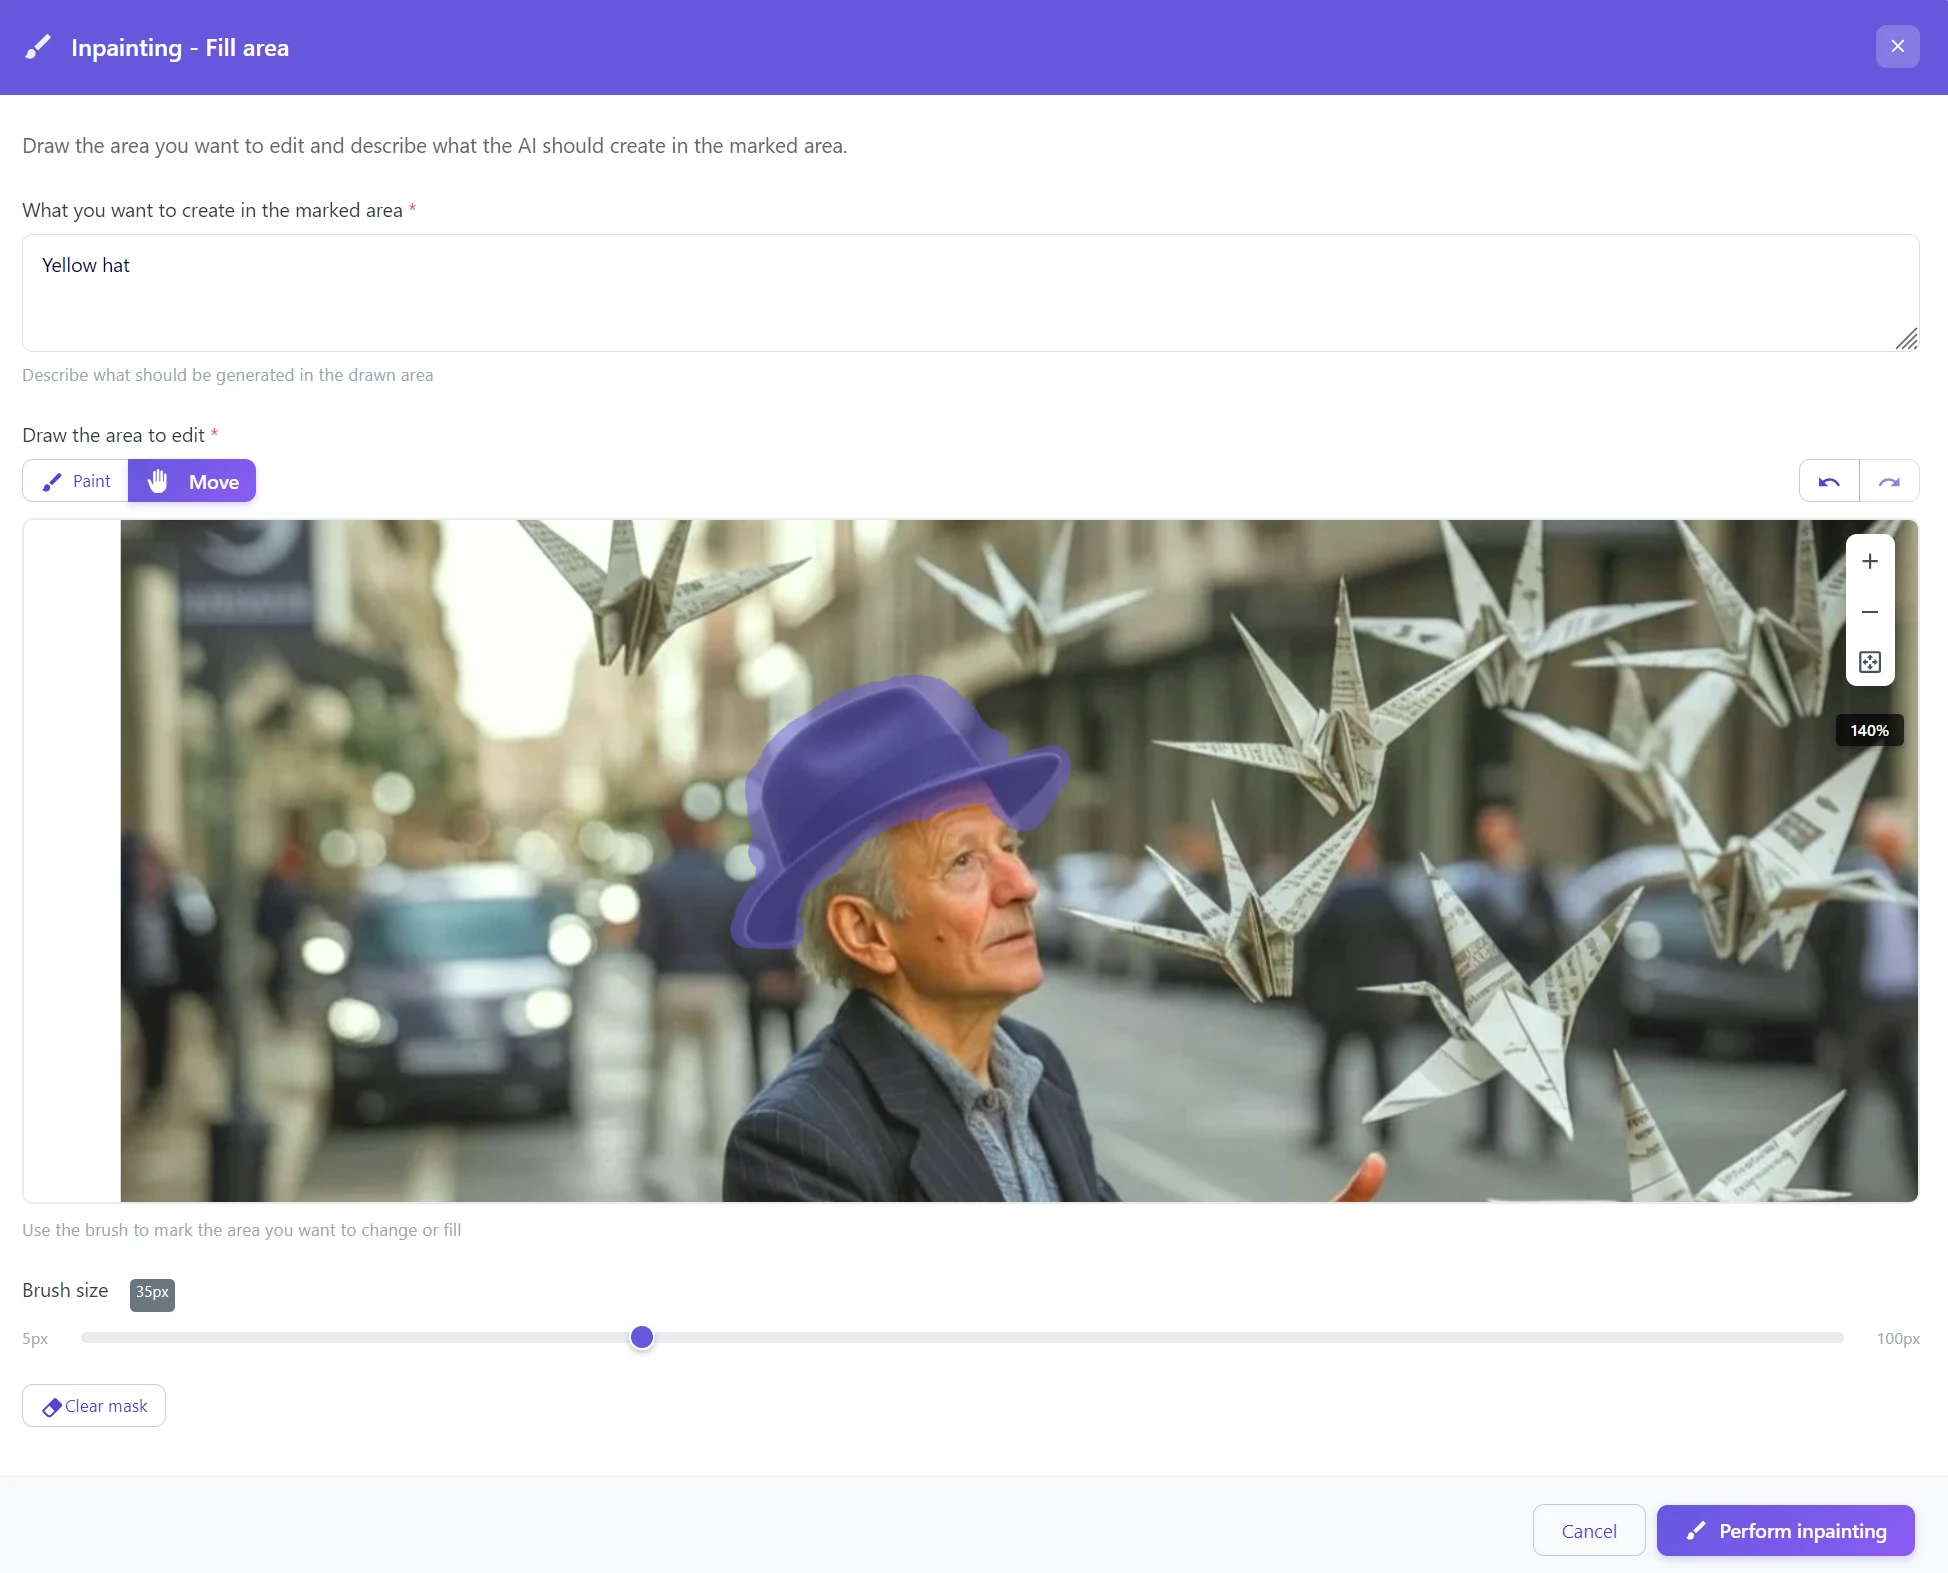
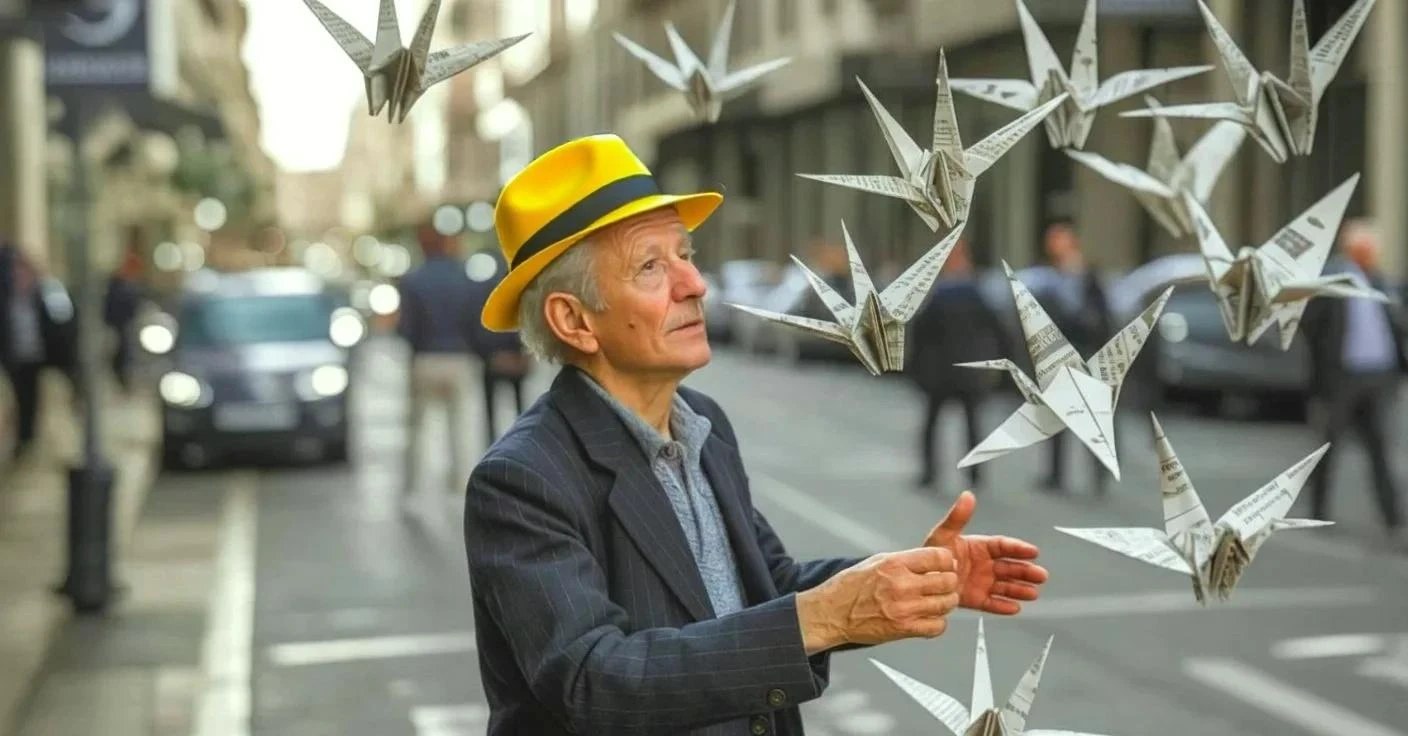
Step 3: Type what AI should create in the marked area – for example, “Yellow hat”.
Step 4: Confirm and observe the result.
Always select a little more
Always mark an area slightly larger than the object itself – ideally with an overlap of 10–20% on each side. AI needs to see the surrounding context (edges, shadows, transitions) to seamlessly connect the new element to the rest of the photo. A too-tight mask leads to sharp and noticeable transitions.
Change a detail in your photo in 15 seconds
Upload a photo, type a command, and see the result in moments.
When to use which tool?
| Feature | Edit Image (text) | Refine Area (brush) |
|---|---|---|
| Principle | AI finds the object based on the description itself | You manually determine the location of the change |
| Precision | Good for clear, nameable objects | Maximum control over placement |
| Speed | Fastest – one command | Requires manual marking |
| Example | ”Change t-shirt to red" | "Add coffee here on the table” |
Golden rule: Do you know exactly what needs to be changed and can describe it in one sentence? → Edit Image. Do you need to be sure that only a specific part changes and nothing else? → Refine Area.
Where AI inpainting is most useful
LinkedIn and corporate portraits
Update your visual without a photographer. Changing the color of a shirt, adjusting a hairstyle, or removing a distracting accessory takes a moment and saves the cost of a new photoshoot. The result looks like the original photo – not a retouched copy.
E-commerce and product photos
Do you have a photo of a product in one color, but sell five? Using inpainting, you can create all color variants from a single photo while preserving shadows, reflections, and composition. You don’t have to reshoot the entire collection every time a new color variant is added.
Social media and seasonal content
Recycle quality content instead of shooting every campaign from scratch. A single good photo can be adapted to different seasons, holidays, or product promotions by changing details – without new photography and without it being noticeable in the result.
Creative projects and AI Art
Generating images with AI? Inpainting is the ideal tool for fine-tuning results – you can fix a hand with six fingers, change a detail that the generator didn’t calculate correctly, or add an element that was missing in the prompt. If you then need the result for printing, don’t forget to upscale it to 4K.
Start changing details in your photos today
A perfect photo is often just about one small detail. With GuideGlare AI tools, you don’t have to compromise or learn complex graphics programs. Change reality using simple words.
Try image editing with GuideGlare AI
Try inpainting, editing, upscaling, outpainting, and other AI adjustments.
Frequently Asked Questions
Do I have to write prompts in English?
No, GuideGlare understands Czech and Slovak. Write your commands in the language that suits you – AI will interpret the context just as well as from English.
How precisely do I need to mark the area for inpainting?
You don’t need to be pixel-perfect. On the contrary, we recommend marking a slightly larger area, with an overlap, so that AI better understands the connection to the surroundings and light. Precise cutting like in Photoshop is not only unnecessary – it can worsen the result by making AI lose the context of transitions.
Does clothing change work on any figure?
Yes, AI recognizes the figure and can replace both the top and bottom parts of clothing. For very complex poses or when multiple objects overlap, it may be necessary to generate more variants until the result is exactly what you want.
What if AI changes a part of the photo I don’t want to change?
If the “Edit Image” tool affected a part that should have remained untouched, switch to “Refine Area” and use the brush to mark only the specific spot. This way, you have full control over what AI is allowed to change.
Can I combine inpainting with other edits?
Yes, and it’s the recommended procedure for achieving the best results. A practical workflow looks like this: first, make changes using inpainting, correct any minor imperfections with another round of “Refine Area”, and if you want to print the result or use it on a 4K display, finish the workflow with the “Upscale Resolution” tool.
Is it possible to undo changes?
Yes, the editor works non-destructively. If you don’t like the result, you can go back a step or generate a new variant – the original photo will remain untouched.
How long does it take to generate a change?
Most adjustments are completed in 15–30 seconds. The exact time depends on the complexity of the marked area and the size of the image. Complex scenes or large masks may take a few seconds longer, but never minutes.